GC26


GC26 Merchant-Facing Countertop Bundle | ||
|---|---|---|
GC26 Merchant-Facing Countertop Bundle | 2600-B-GC26C | |
2600-MFD | ||
2600-CS | ||
2600-HUB1 | ||
2600-USBC | ||
2600-PS | ||
2600-PCORD | ||
*Customer-Facing Display ordered separately.

GC26 10.1-in Customer-Facing Display without Payments Bundle | ||
|---|---|---|
GC26 CFD without payment Bundle | 2600-B-CFD | |
GC26 | Customer-Facing Display | without Payment requires Moby5500M | 2600-CFD | |
CFD Arm to Hub—type-C 250mm, 180° - 90° cable | 2600-TypeC-ARM | |
CFD arm bracket—kit | 2600-CFD-ARM | |
*Merchant-Facing Display ordered separately.
|
GC26 | Customer-Facing Display with Payment Bundle | ||
|---|---|---|
GC26 CFD with Moby 5500M Portico Key Bundle | 2600-B-CFD-wPMT-P | |
2600-B-CFD-wPMT | ||
Moby 5500M with Portico Key | 2600-Moby-P | |
CFD Arm to Hub—type-C 250mm, 180° - 90° cable | 2600-TypeC-ARM | |
CFD arm bracket—kit | 2600-CFD-ARM | |
|
GC26 | Customer-Facing Display with Payment Bundle | ||
|---|---|---|
GC26 CFD with Moby 5500M TransIT Key Bundle | 2600-B-CFD-wPMT-T | |
2600-B-CFD-wPMT | ||
Moby 5500M with Portico Key | 2600-Moby-T | |
CFD Arm to Hub—type-C 250mm, 180° - 90° cable | 2600-TypeC-ARM | |
CFD arm bracket—kit | 2600-CFD-ARM | |
 |
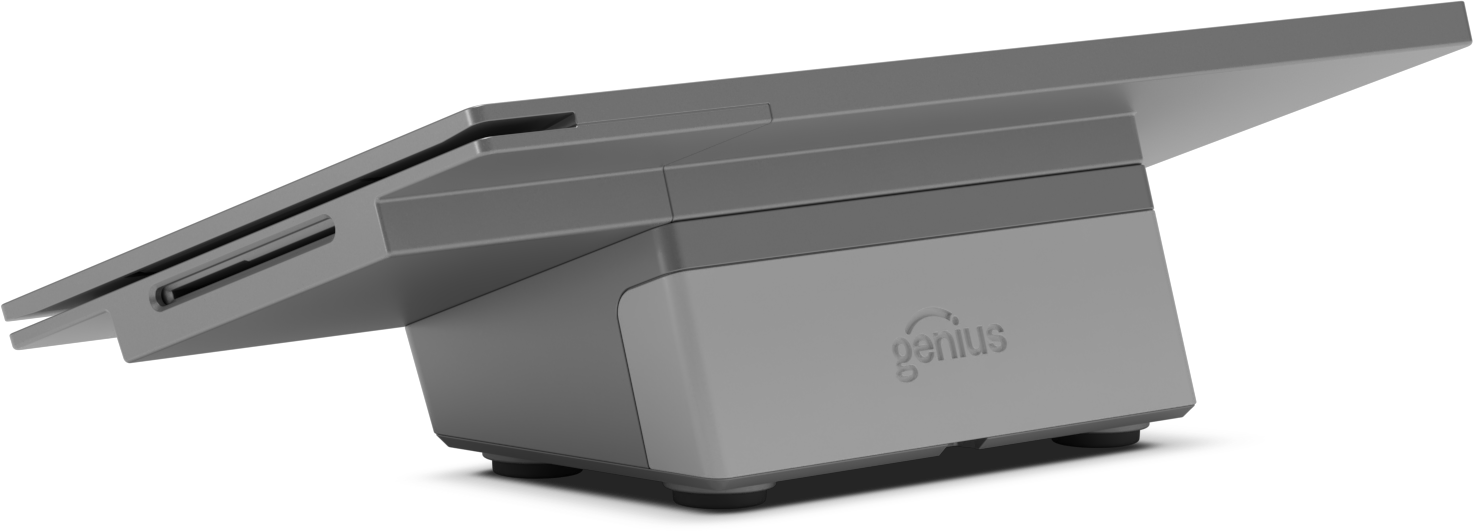
GC26 Merchant-Facing Display Low Profile Bundle | ||
|---|---|---|
GC26 CFD with Moby 5500M Bundle | 2600-B-GC26L | |
GC26 15.6-in Merchant Facing Display with 256GB Drive | 2600-MFD | |
GC26 Low Profile Stand | 2600-LPS | |
GC26 POS Hub 1 with DC Power input and 25V PUSB | 2600-HUB1 | |
GC26 USBC, MFD to Hub cable—full function | 2600-USBC | |
GC26 DC Power Supply | 2600-PS | |
GC26 DC Power Cord | 2600-PCORD | |
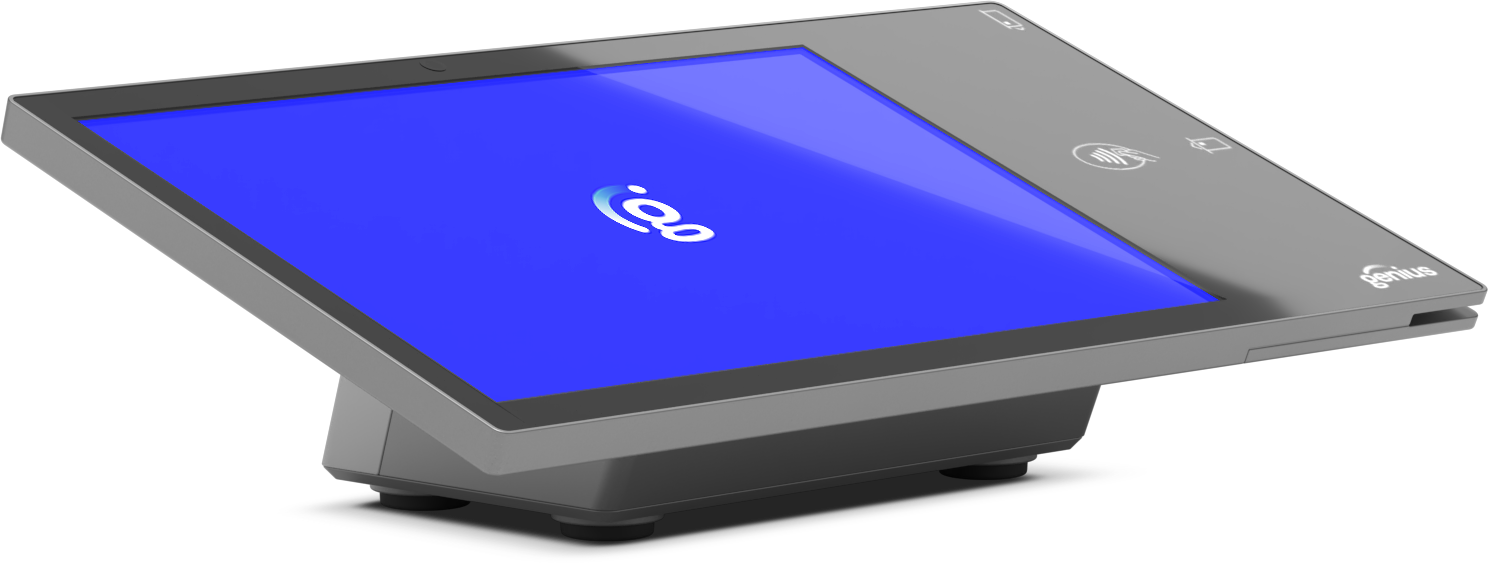
GC26 Customer-Facing Display without Payments Low Profile Bundle | ||
|---|---|---|
Genius 10.1-in Customer-Facing Display—without payments—Low Profile Stand Bundle | 2600-B-CFD-LP | |
Genius GC26 10.1-in Customer-Facing Display, without payments | 2600-CFD | |
GC26 Low Profile Stand | 2600-LPS | |
Genius VESA Bracket for 10.1-in CFD, no payment | 2600-VESA-NP | |
Genius GC26 POS USB-C CFD Low Profile to Hub Cable | 2600-USBC-CFDLP | |
GC26 Customer-Facing Display Low Profile Bundle | ||
|---|---|---|
Genius Customer-Facing 10.1-in Display with Moby Portico Payment; Low Profile Stand Bundle | 2600-B-CFD-wPMT-P-LP | |
Genius GC26 10.1-in Customer-Facing Display supports payment (Moby 5500M required) | 2600-CFD-wPMT | |
Genius GC26 POS Moby 5500M with Portico Key | 2600-Moby-P | |
GC26 Low Profile Stand | 2600-LPS | |
Genius VESA Bracket for CFD with payment | 2600-VESA-PMT | |
Genius GC26 POS USB-C CFD Low Profile to Hub Cable | 2600-USBC-CFDLP | |
GC26 Customer-Facing Display Low Profile Bundle | ||
|---|---|---|
Genius Customer-Facing 10.1-in Display with Moby TransIT Payment; Low Profile Stand Bundle | 2600-B-CFD-wPMT-T-LP | |
Genius GC26 10.1-in Customer-Facing Display supports payment (Moby 5500M required) | 2600-CFD-wPMT | |
Genius GC26 POS Moby 5500M with TransIT Key | 2600-Moby-T | |
GC26 Low Profile Stand | 2600-LPS | |
Genius VESA Bracket for CFD with payment | 2600-VESA-PMT | |
Genius GC26 POS USB-C CFD Low Profile to Hub Cable | 2600-USBC-CFDLP | |

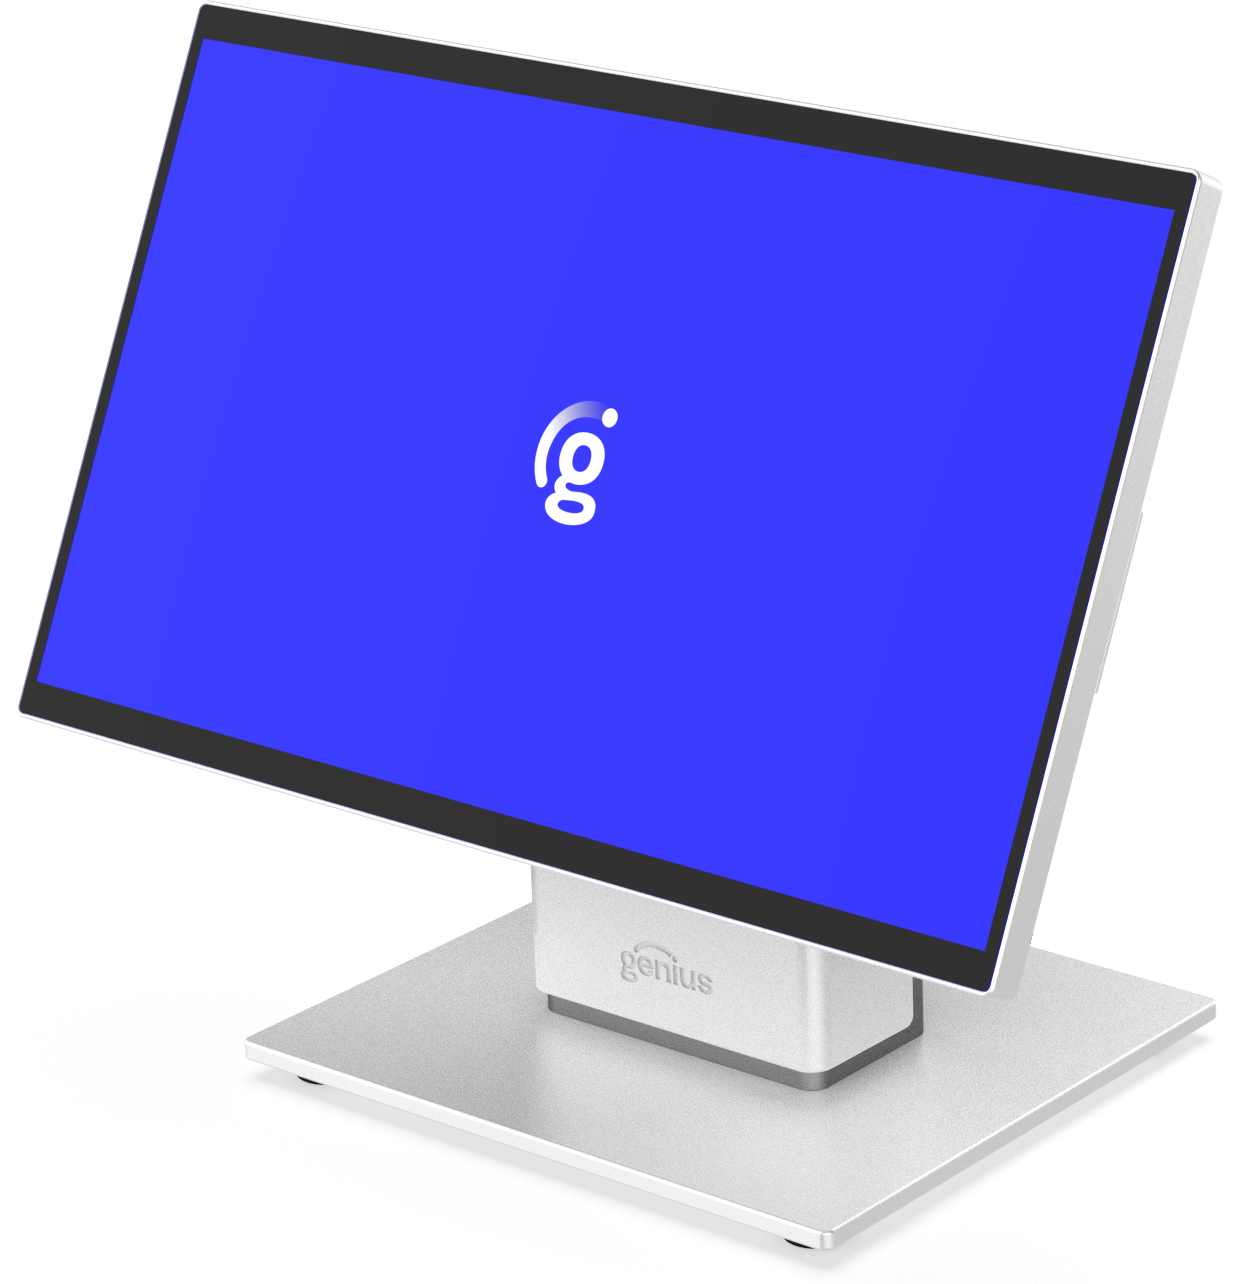
GC26 | Merchant-Facing Display | |
|---|---|
SF Model | 2600-MFD |
Display | 15-in countertop display |
System | G99 with Intel Alder Lake N97 |
Memory | 8GB DDR4 onboard |
Storage | 256GB M.2 SSD |
Network | M.2 (E-Key), 1 x M.2 2230 for 802.11 a/b/g/n/ac with optional BT5.2 |
Display | 15.6-in LED, True-Flat PCAP Multi-touch—direct bonding |
Resolution | 1920 x 1080 (Full HD) |
Brightness | 500-nits |
Connectivity (I/O) | LAN, 1 x RJ-45 (10/100/1000 BaseT) with PoE++—min: 45W USB Type-C, 1 x Type-C (power), USB3.0, 20V/5A input and 5V/3A output, On The Go support; 1 x Type-C (display), support ALT with PD (5V,12V) |
Peripheral port | Pogo PIN, 1x right side; 1x left side |
Magnetic Stripe Reader | Yes |
Fingerprint Biometrics | Yes |
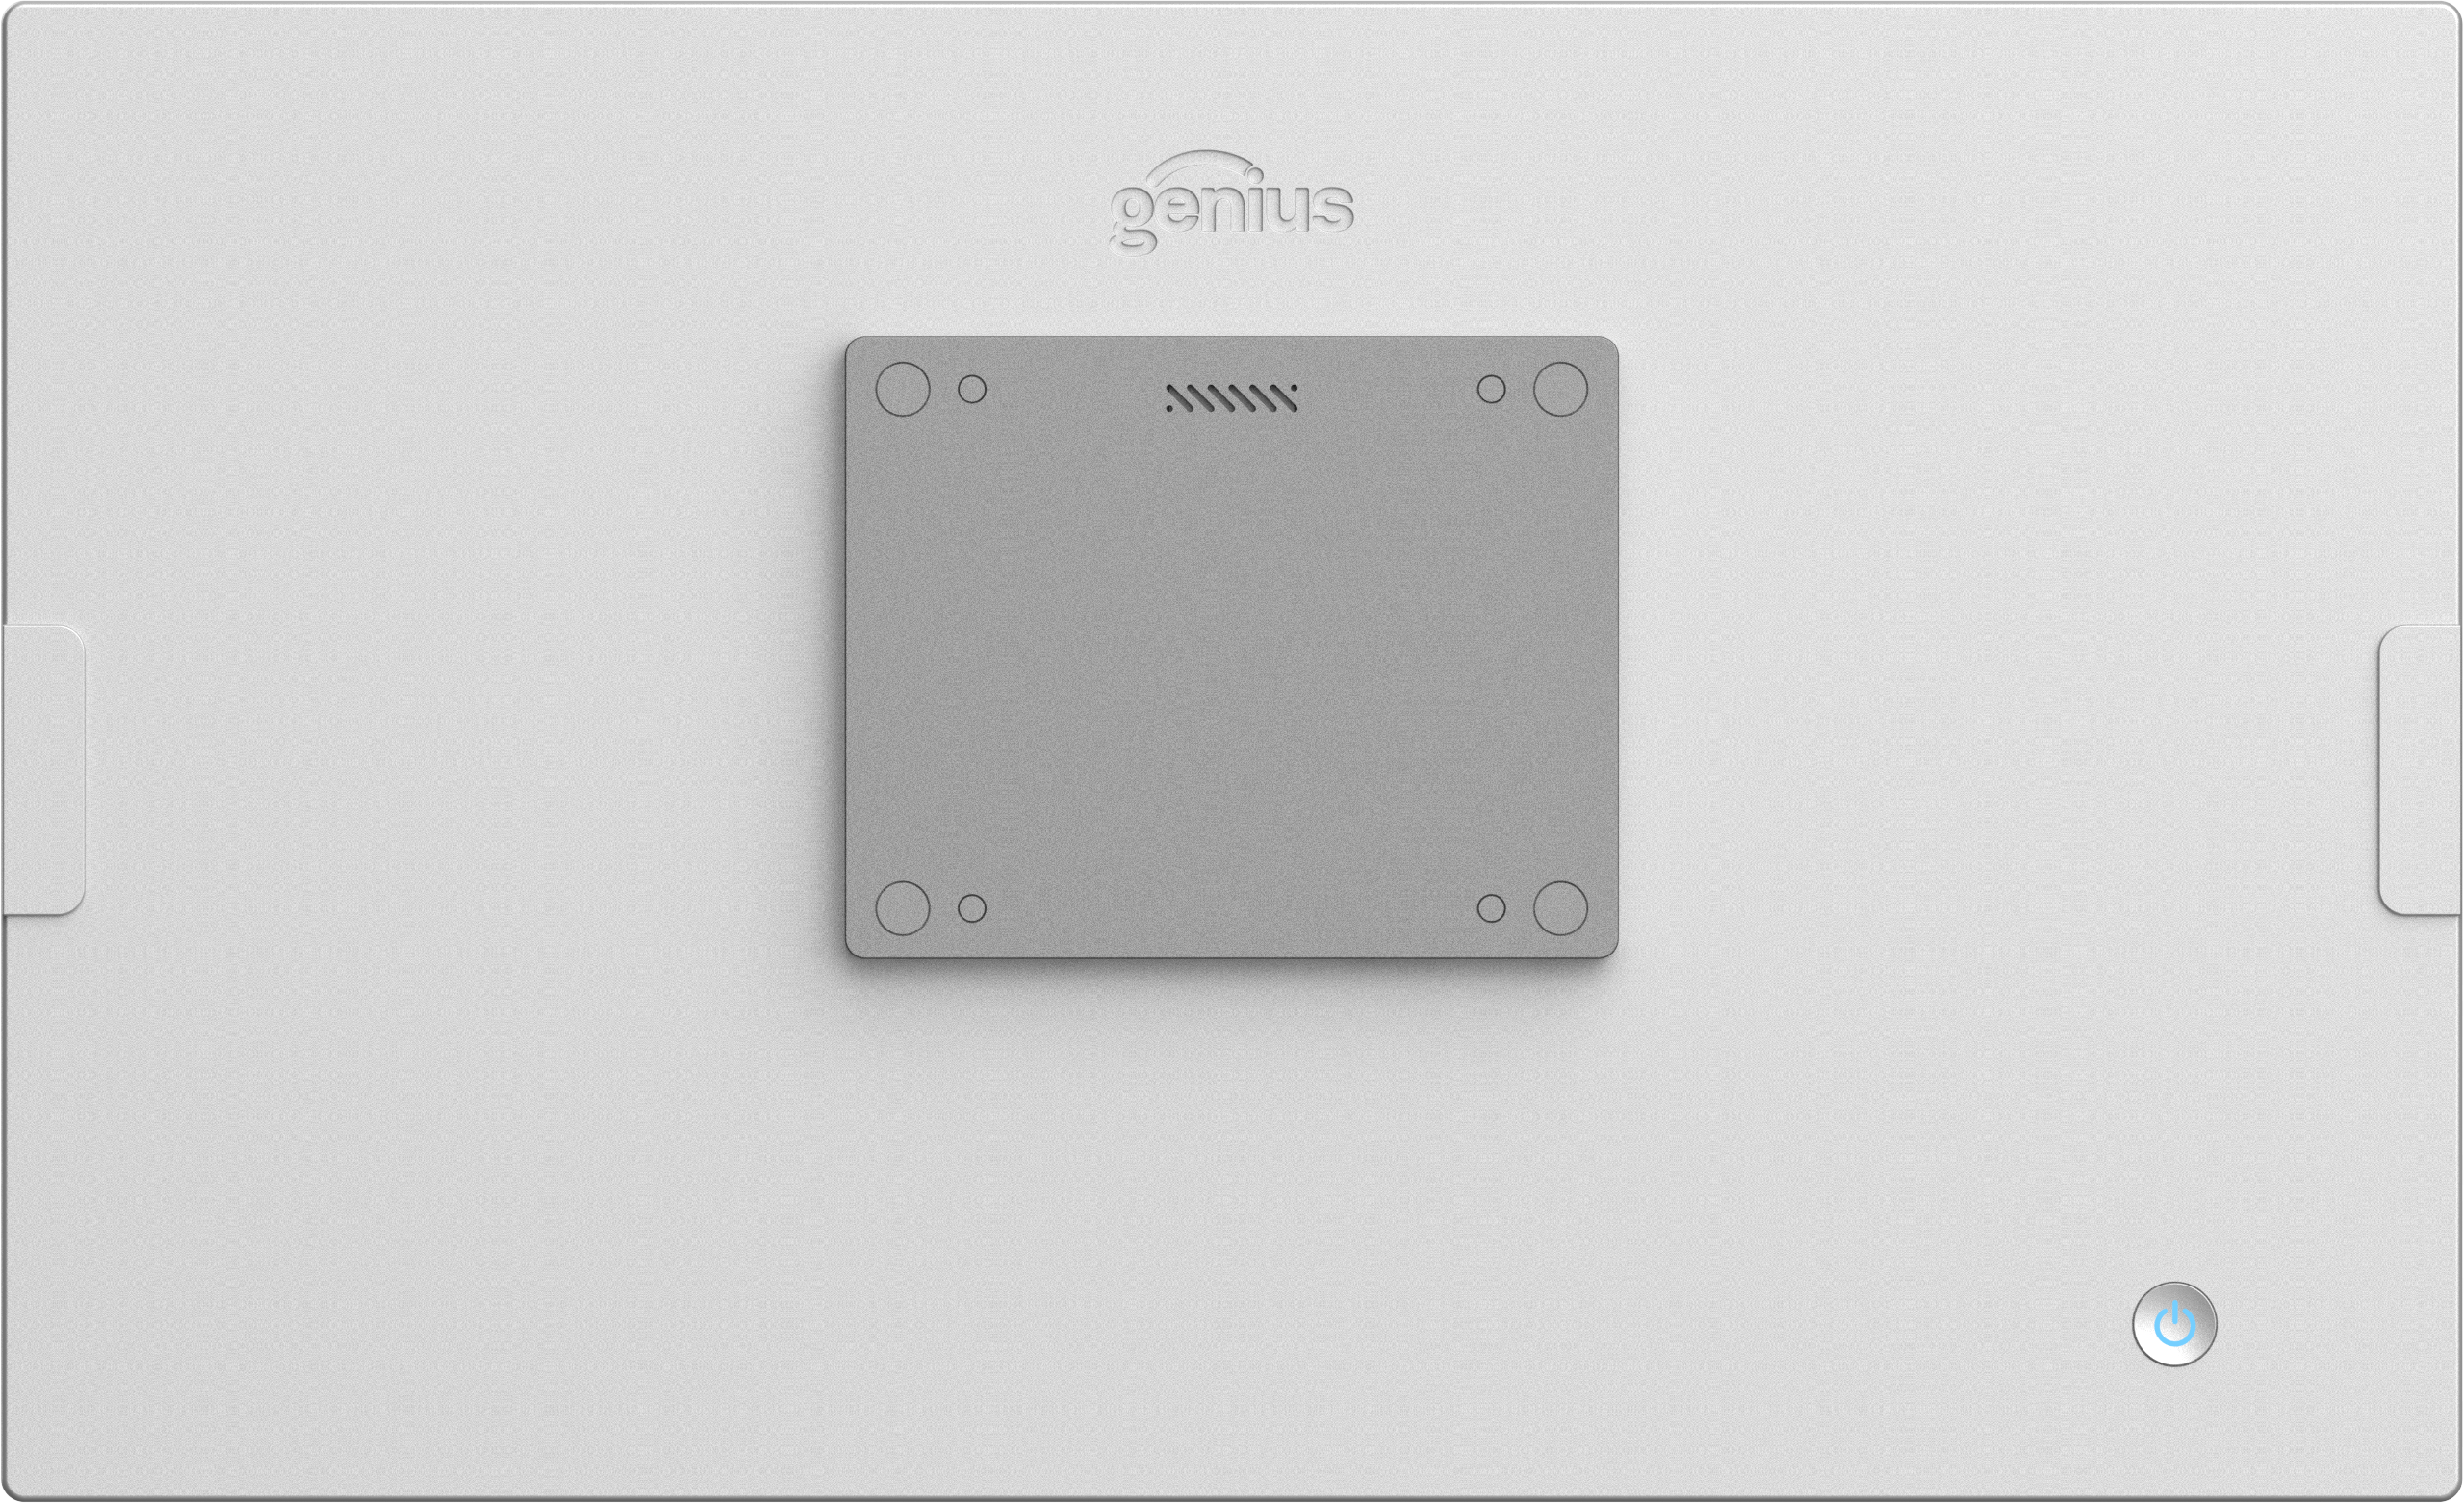
Power button | 1 x Installed on the back cover |
Camera | 1 x 5M |
Audio | Internal speaker, 1 x 1W |
VESA Mount | 75 x 75 |
Environment |
|
Certificates | EMC and Safety: FCC and CE Mark Class A, LVD Dust and Waterproof IP Rating: IP54 |
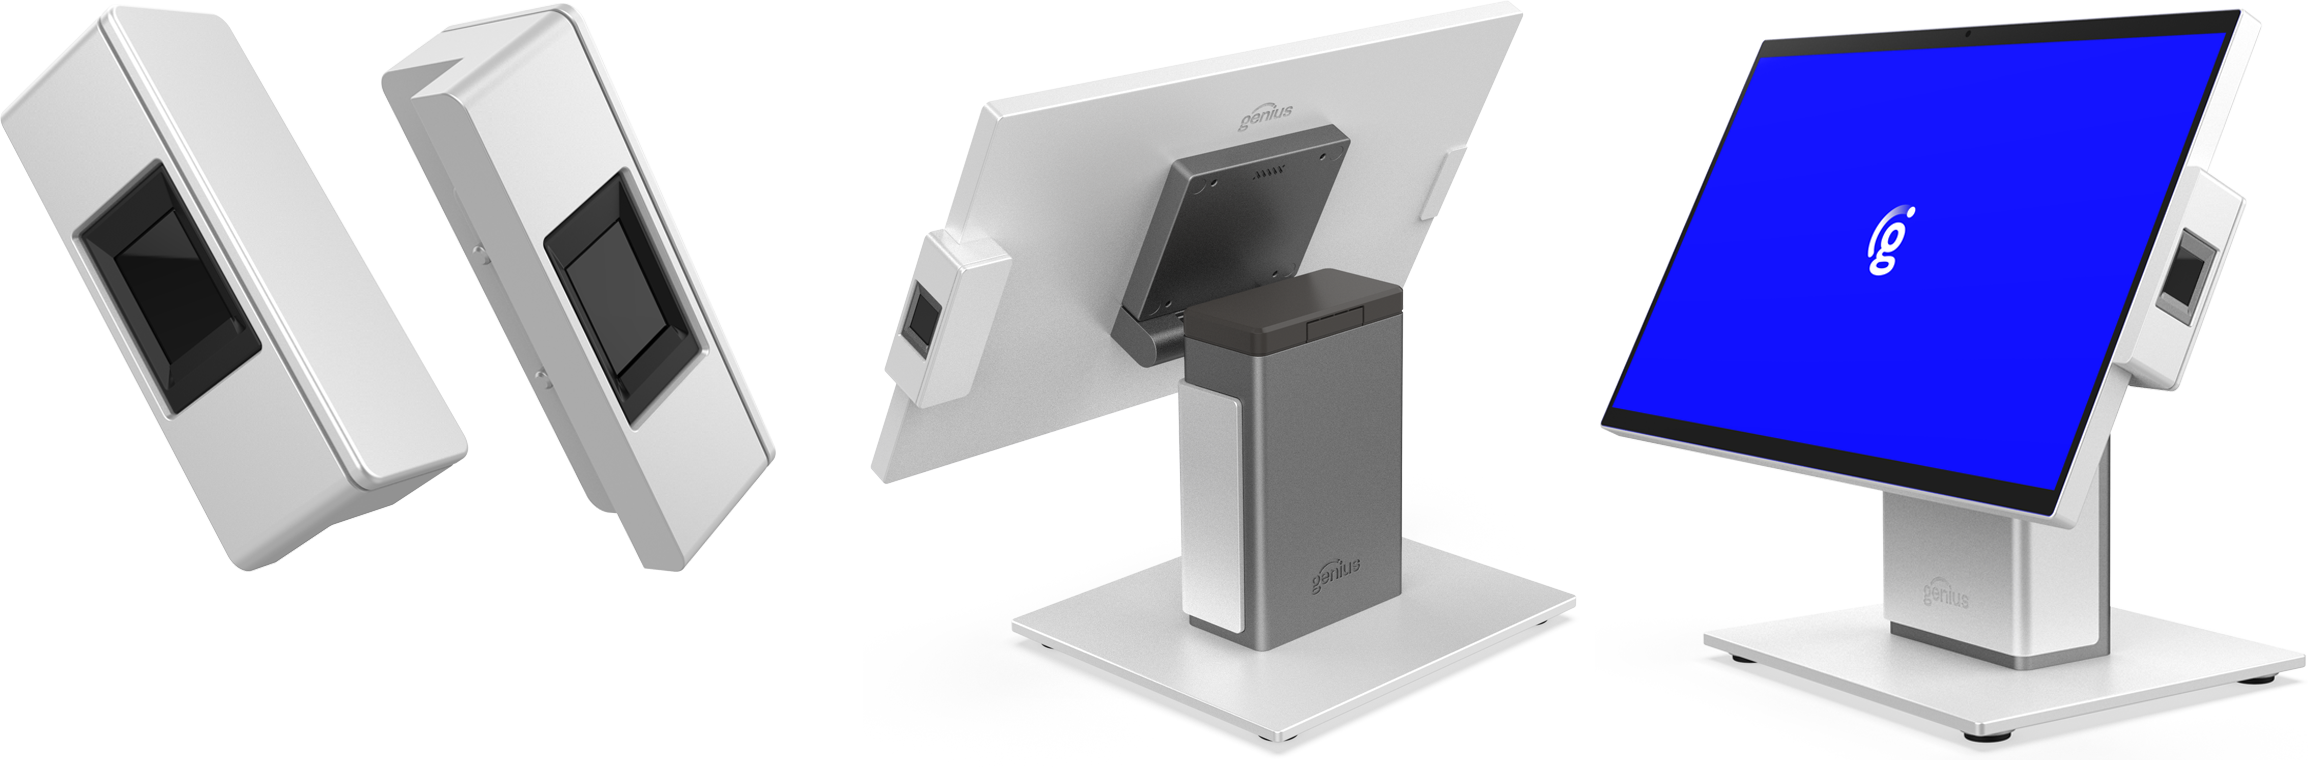
GC26 | Hub | |
|---|---|
SF Model | 2600-HUB1 |
Connection | USB-C, attached to the panel or stand |
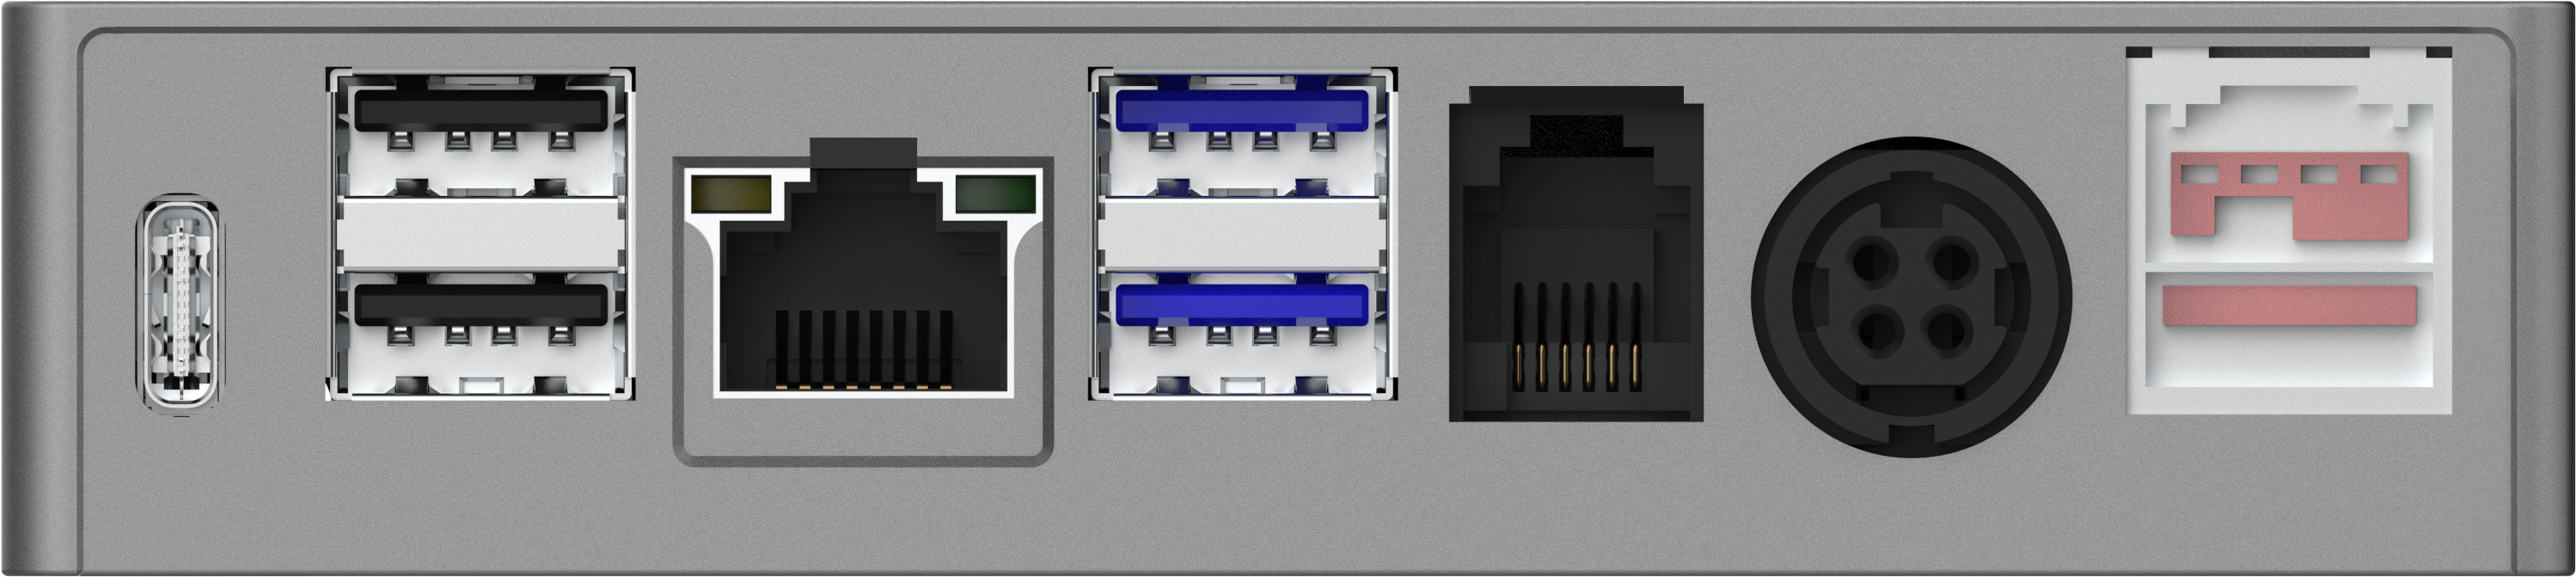
Ports | 1x USB-C for CFD, 2x USB-a 2.0, 2x USB-a 3.0, LAN RJ45, RJ11 CD, DC Jack, PUSB 24V |
GC26 | Counter Stand | |
|---|---|
SF Model | 2600-CS |
Connection | DC-in 19V, 4-pin with lock |
 |
GC26 | DC Power Supply | |
|---|---|
SF Model | 2600-PS |
Power Supply | DC Jack 19V/120W |
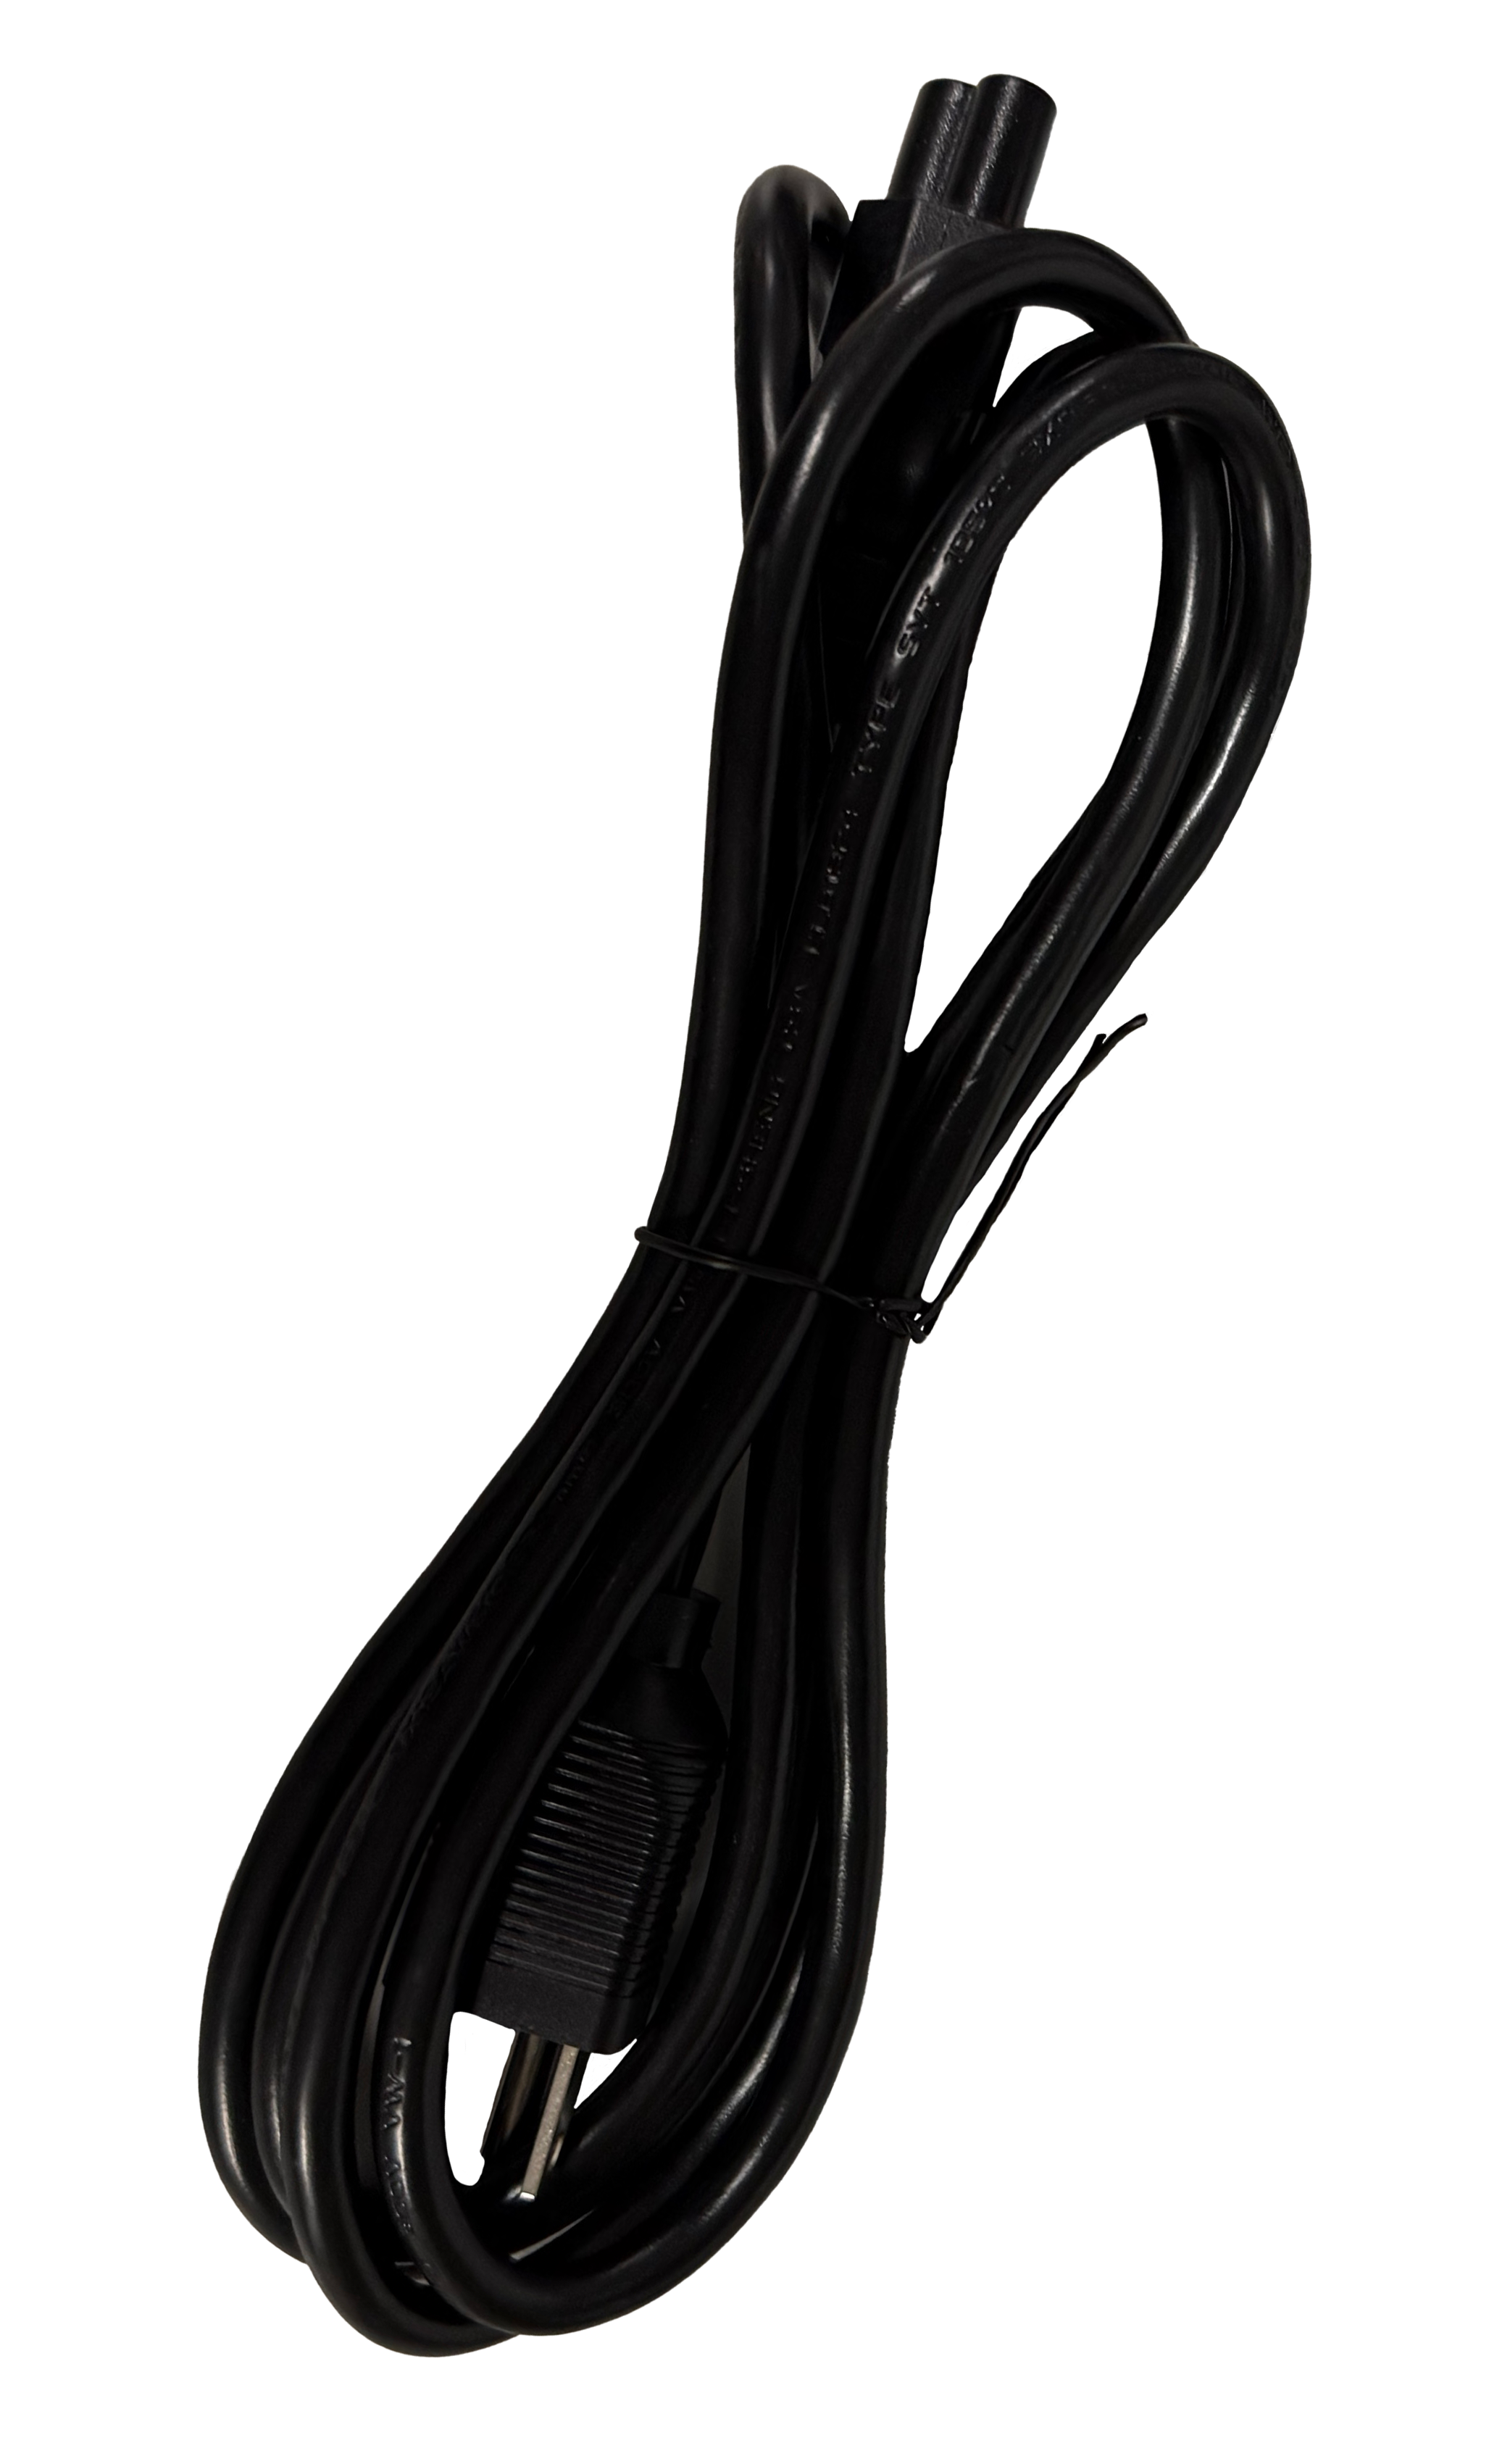 |
DC Power Cord | |
|---|---|
SF Model | 2600-PCORD |

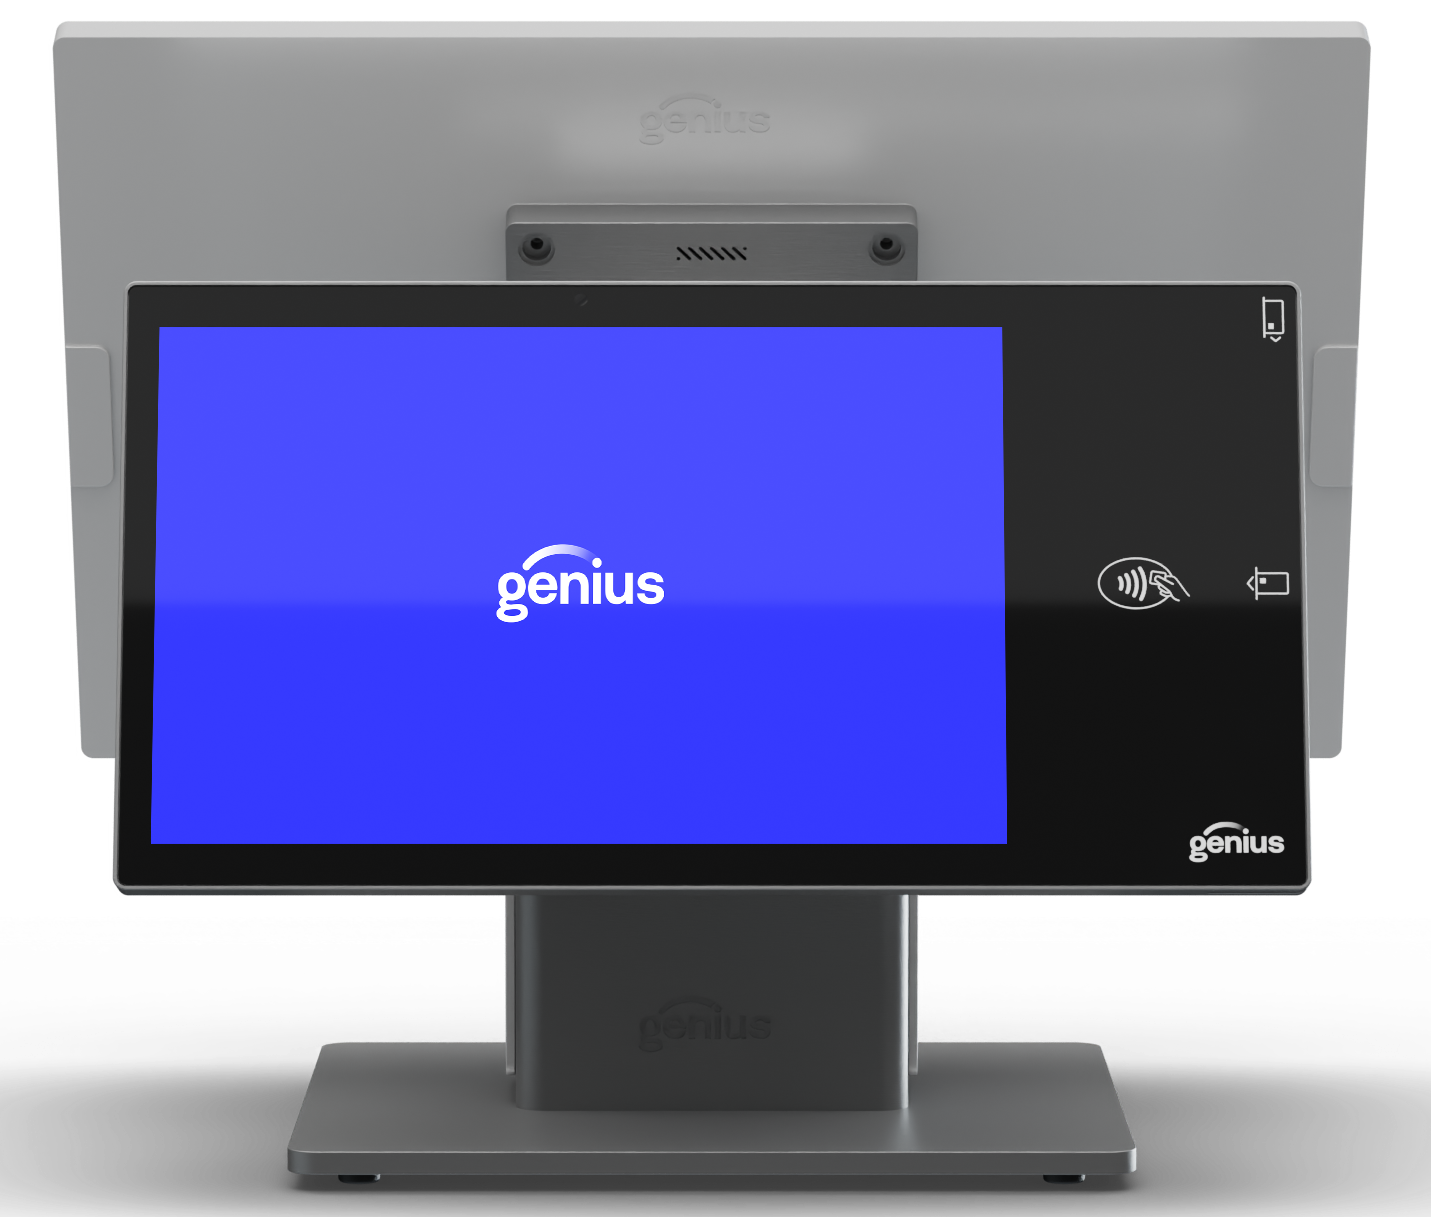
GC26 | Customer-Facing Display (CFD) | |
|---|---|
SF Model | 2600-B-CFD, requires Moby 5500M |
Display | 10.1-inch LCD True-Flat PCAP Multi-touch; direct bonding |
Resolution | 1900 x 1200 |
Brightness | 500-nits |
Bezel | Glass |
Connection | 1x USB-C support ALT with PD (5V,12V) |
Peripheral module | Required—embedded Moby 5500M payment reader; connects through internal USB |
Camera | 5M fixed focus, built-in |
Audio | 1x 1W |
VESA Mount | 75 x 75, on back |
Environment |
|
Certificates | EMC and Safety: FCC and CE Mark Class A, LVD Dust and Waterproof IP Rating: IP54 |
Mounting configurations | Landscape or Portrait; connects to Merchant-Facing Display (MFD) stand or sets on countertop |
GC26 | Customer-Facing Display (CFD) | |
|---|---|
SF Model | 2600-B-CFD-wPMT |
Display | 10.1-inch LCD True-Flat PCAP Multi-touch; direct bonding |
Resolution | 1900 x 1200 |
Brightness | 500-nits |
Bezel | Glass |
Connection | 1x USB-C support ALT with PD (5V,12V) |
Peripheral module | Required—embedded Moby 5500M payment reader; connects through internal USB |
Camera | 5M fixed focus, built-in |
Audio | 1x 1W |
VESA Mount | 75 x 75, on back |
Environment |
|
Certificates | EMC and Safety: FCC and CE Mark Class A, LVD Dust and Waterproof IP Rating: IP54 |
Mounting configurations | Landscape or Portrait; connects to Merchant-Facing Display (MFD) stand or sets on countertop |
Fingerprint Scanner | |
|---|---|
SF Model | 2600-FP |
Type | Biometric fingerprint scanner |
Connection | 4-pin pogo-type USB |
Placement | Side-attached to GC26 |
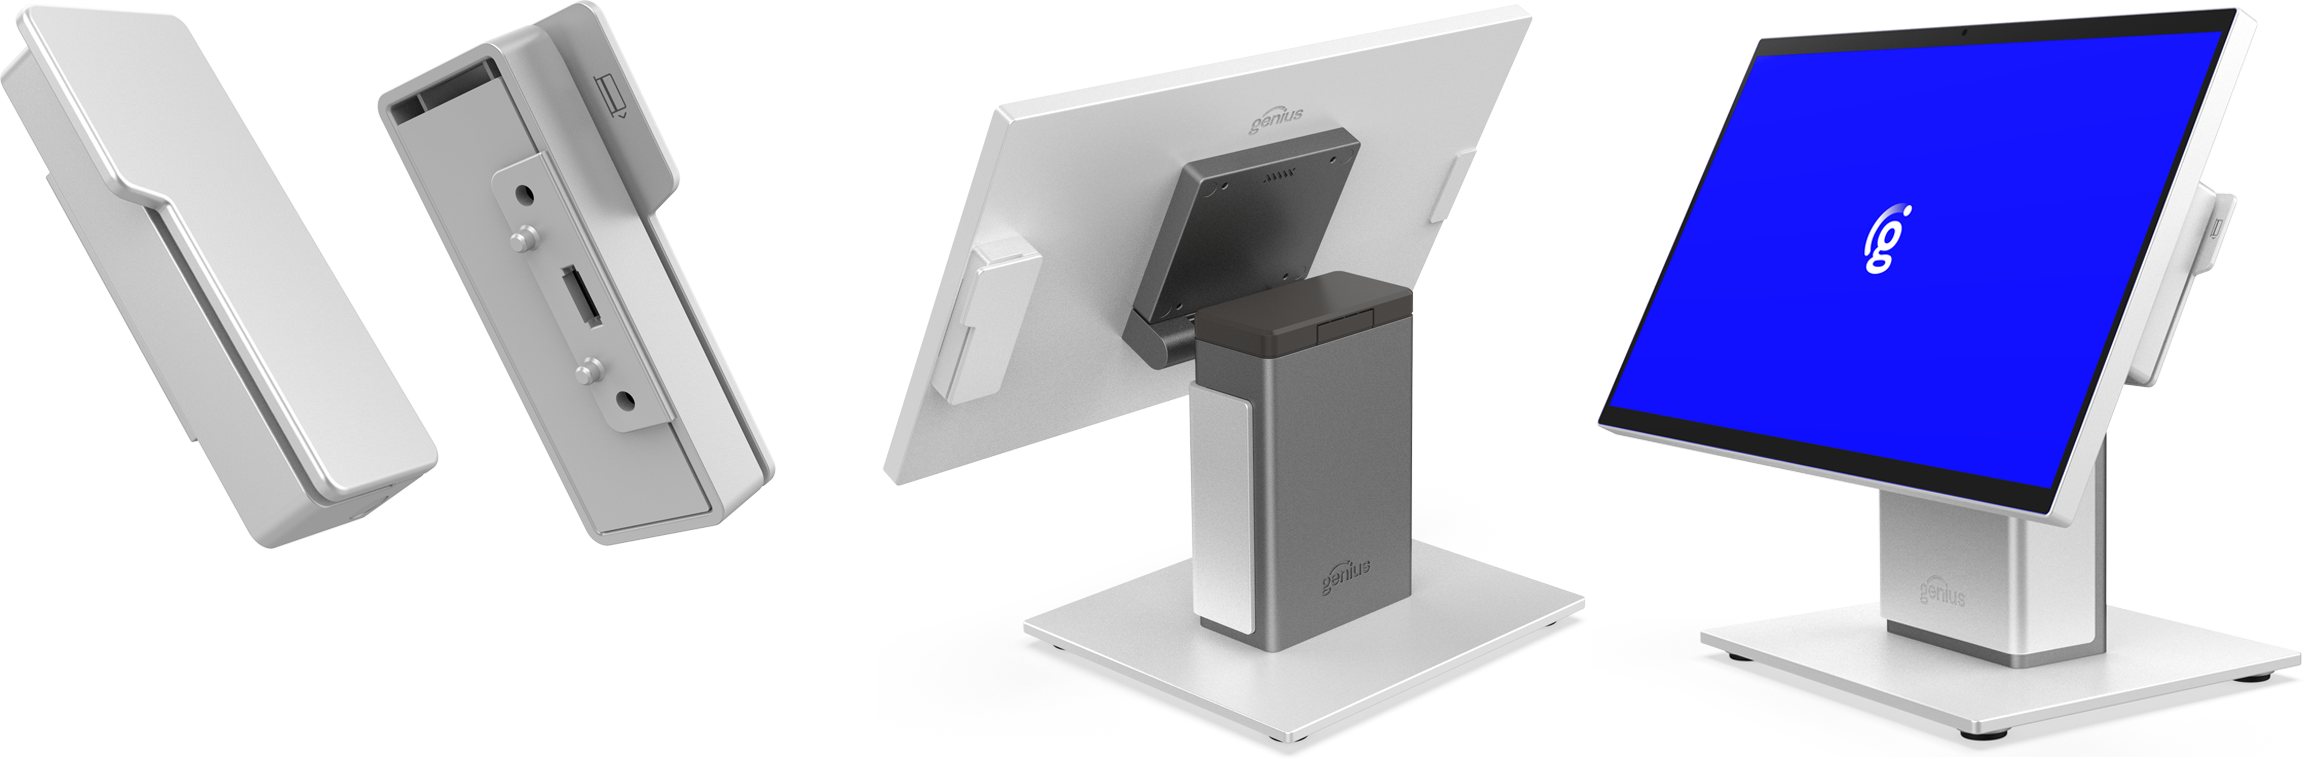
Magnetic Stripe Reader (MSR) | |
|---|---|
SF Model | 2600-MSR |
Type | Magnetic-stripe reader |
Connection | 4-pin pogo-type USB |
Placement | Side-attached to GC26 |
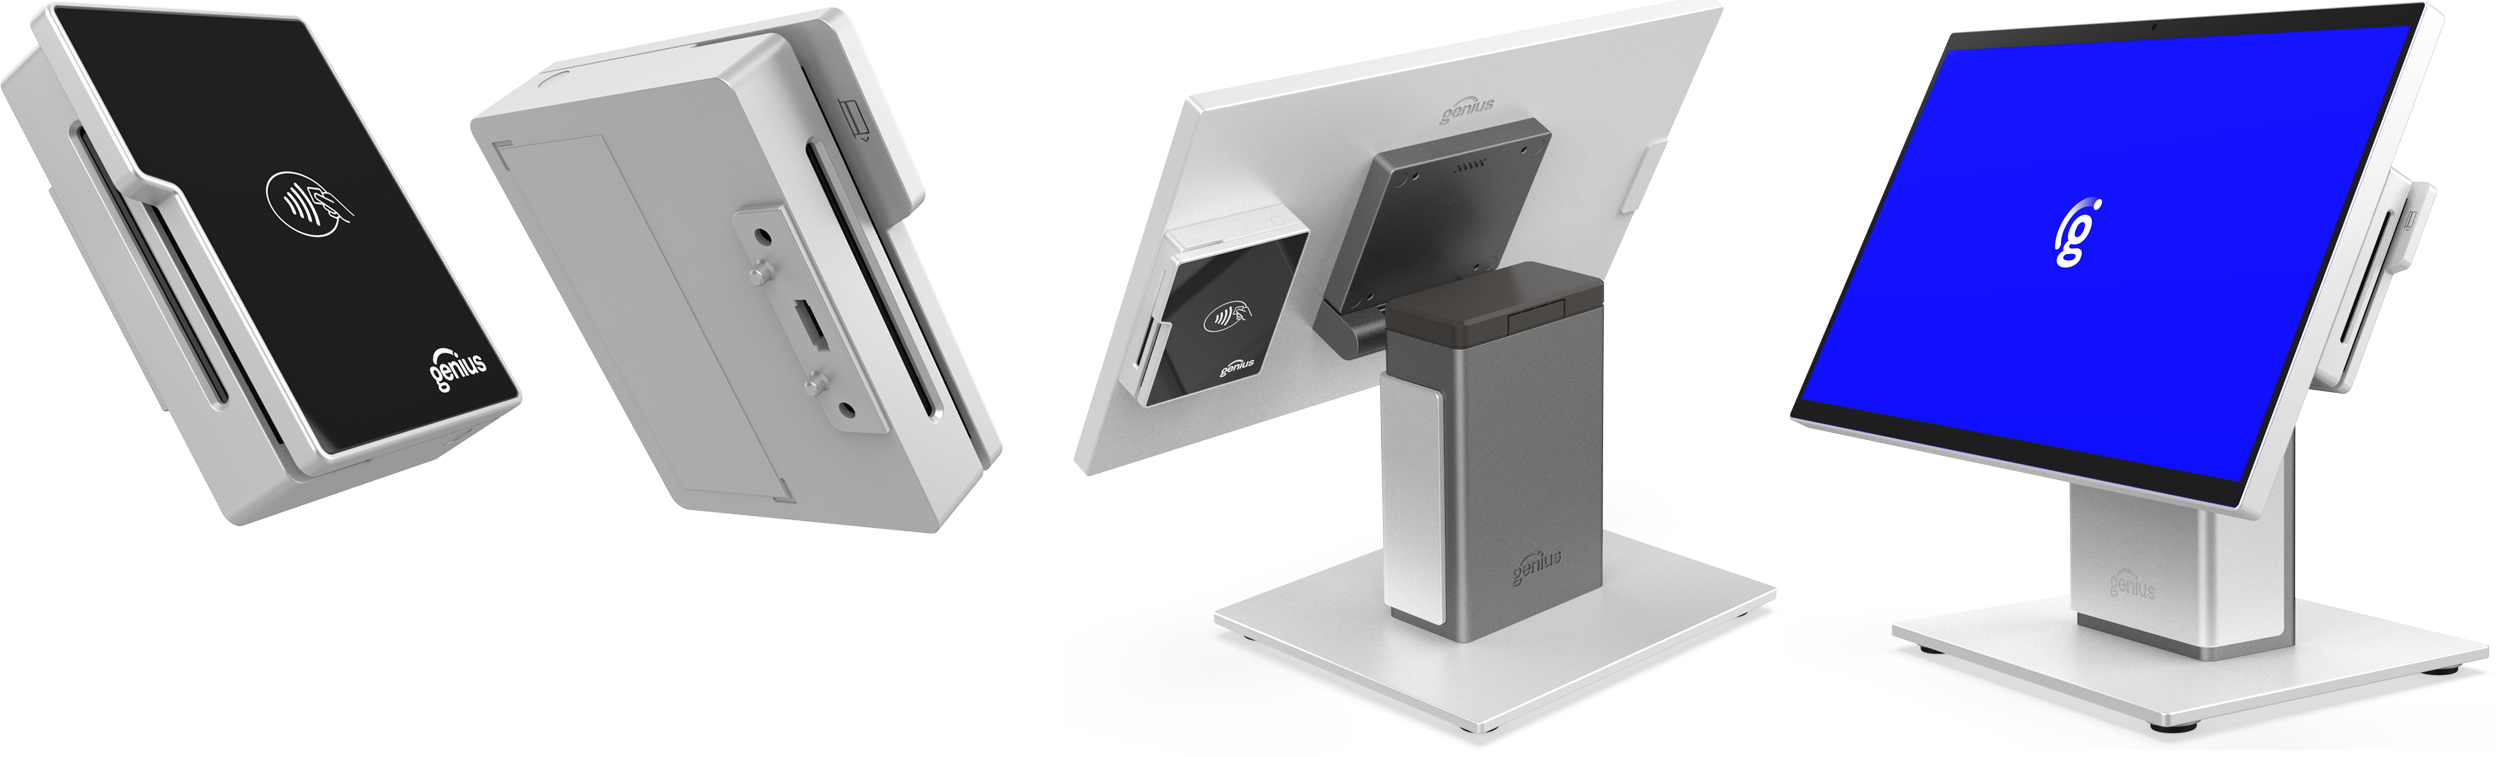
NFC Payment Reader | |
|---|---|
SF Model | Salesforce Model Number |
Type | Ingenico Moby5500M, NFC Payment Reader |
Connection | 4-pin pogo-type USB |
Placement | Side-attached to GC26 |
Before proceeding, ensure all components are present:
GC26—arrives assembled and ready to go
15.6-inch Merchant Facing Display (MFD)
Counter Stand
Plastic top cover—removable
Genius branded metal front cable cover—magnetic, removable
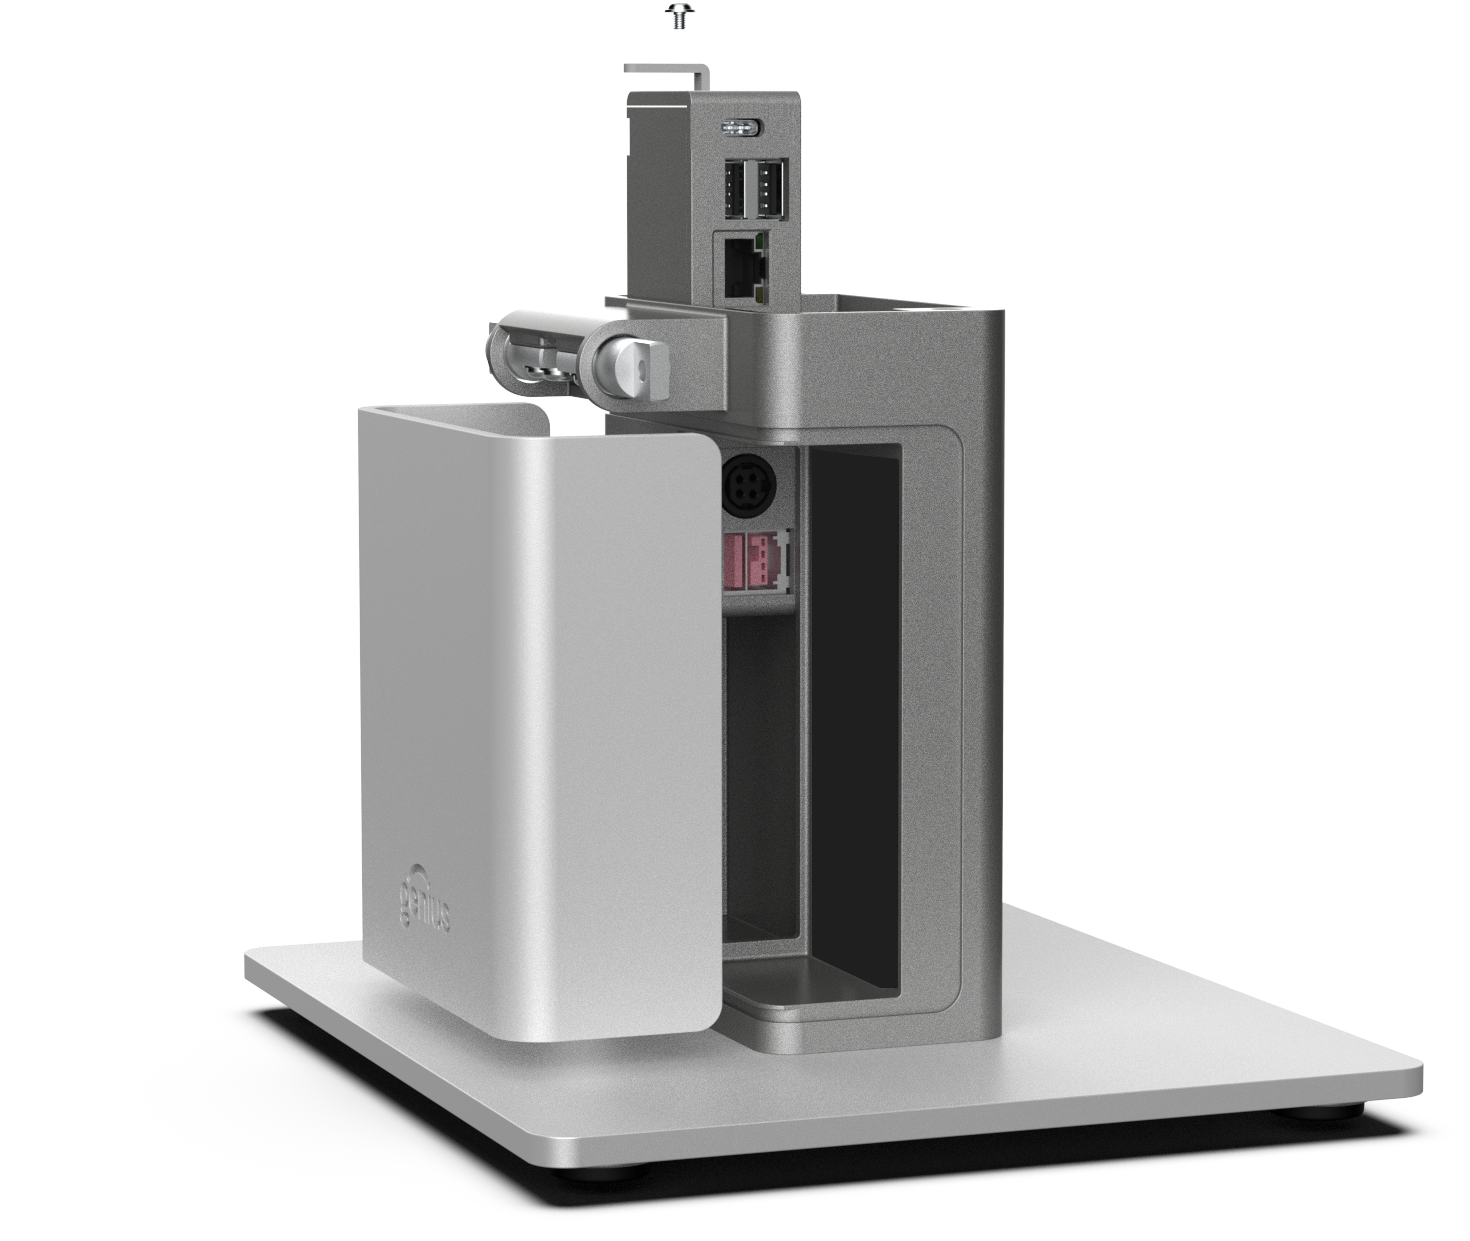
Port Hub
USB-C Cable for the MFD
Optional 10.1-inch Customer Facing Display—with or without Payment Reader
Either a bracket attached to the counter stand with a short, USB-C cable
Or attached to a dedicated low-profile stand with a longer USB-C cable
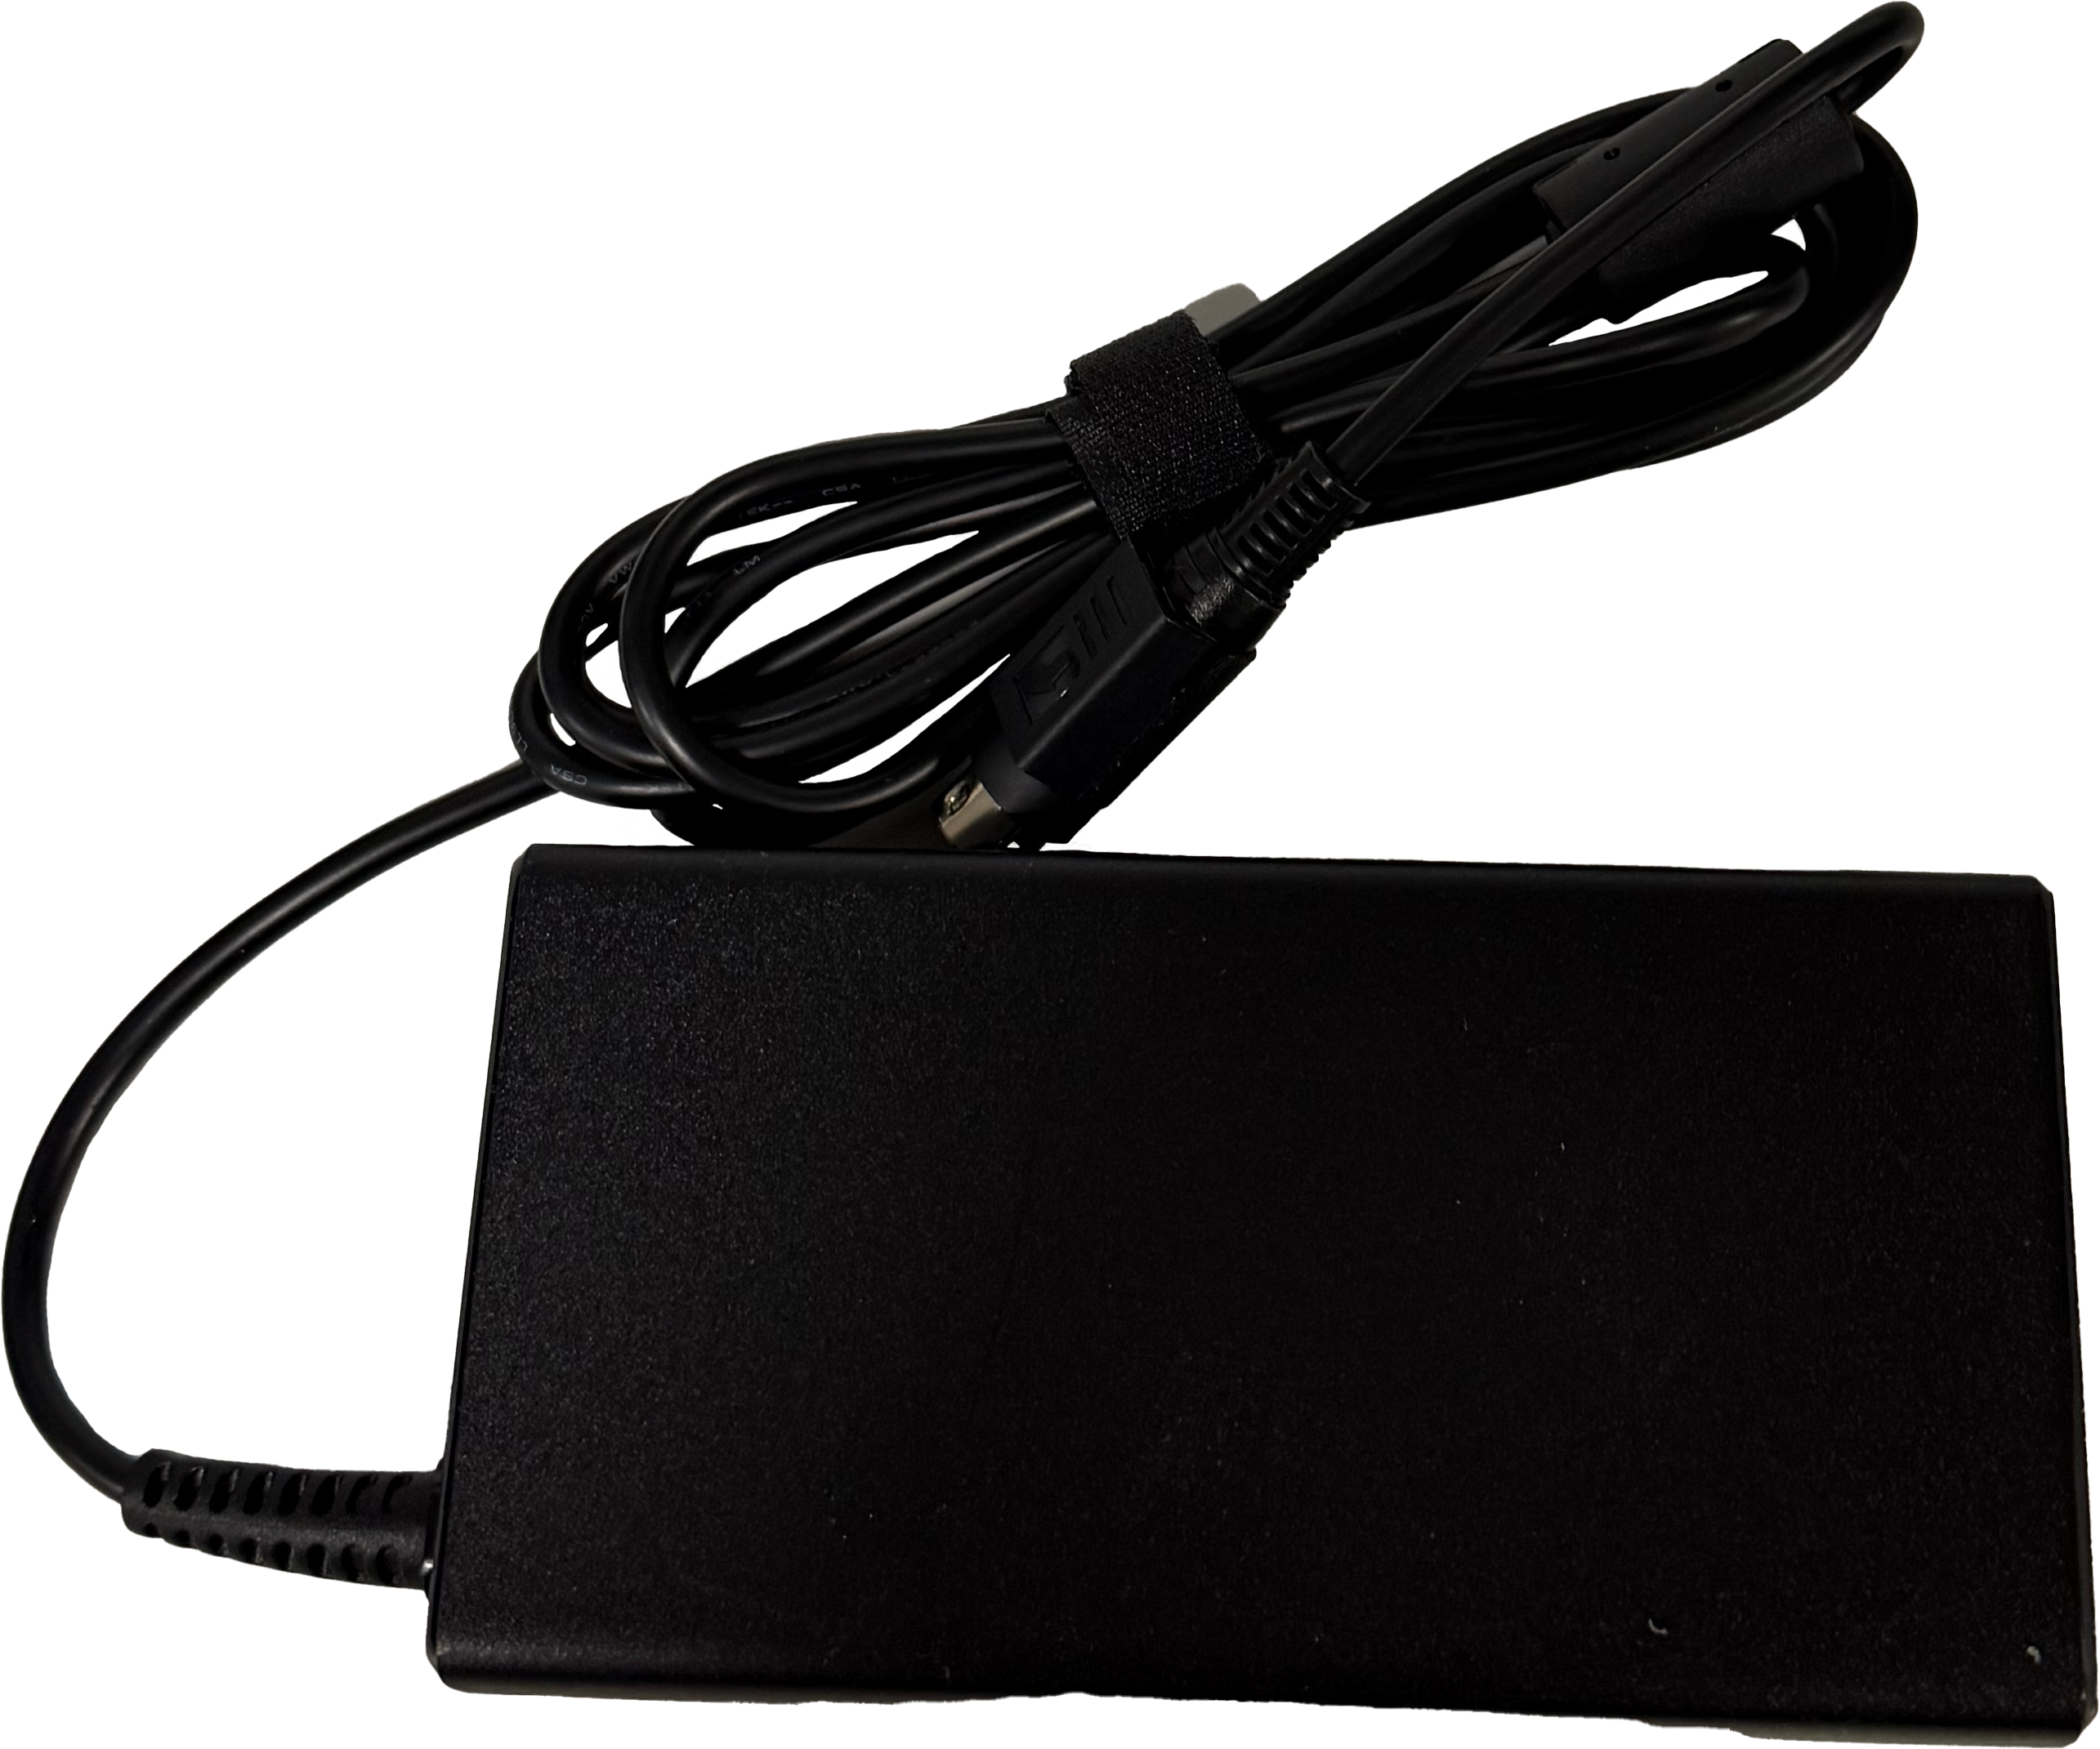
GC26 Power Supply
GC26 Power Cable
Note
If using Genius Restaurant, see Genius Restaurant | Add Location to NextGen prior to setup. If using Genius Enterprise, continue to the procedure below.
1 | Remove and discard shipping tape and covers from the display(s), stand, and cables. |  |
2 | Tilt the merchant-facing display back to access the counter stand cover. | 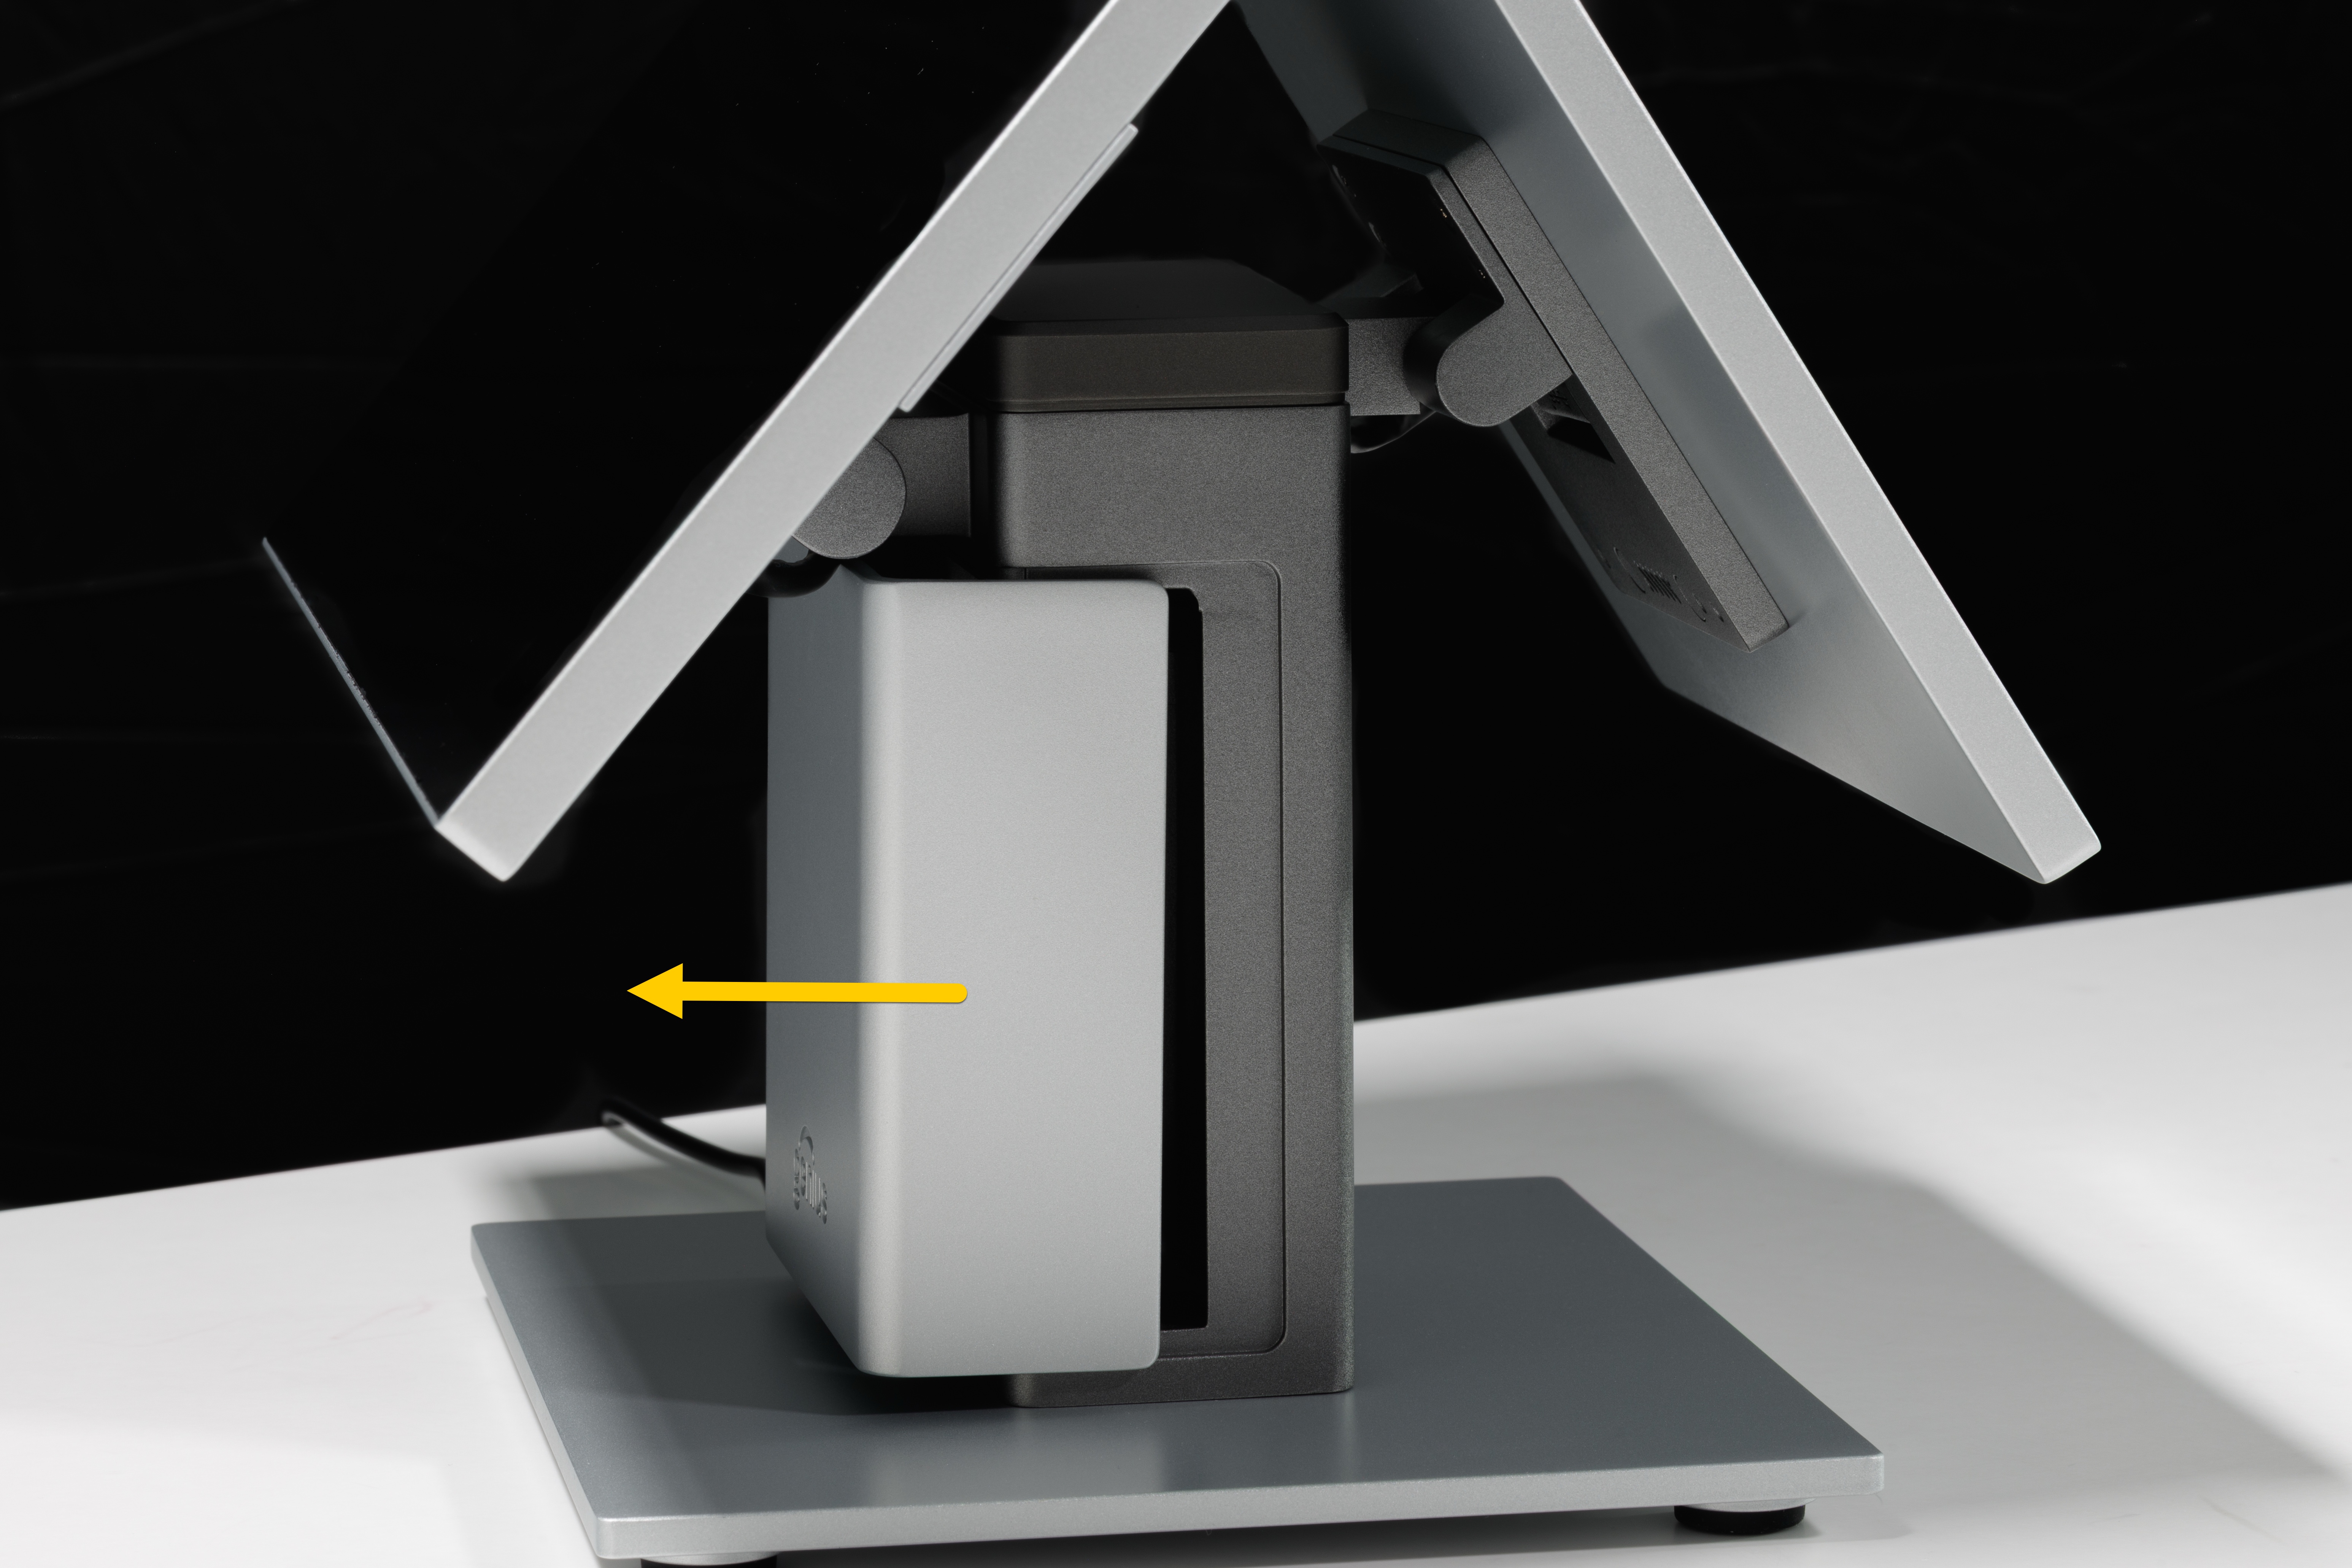 |
3 | Remove the magnetic cable cover from the counter stand to reveal the port hub, then set the cover aside. |  |
4 | Through the hole in the very bottom of the stand, route all of the cables up through the stand—cables include the power cord, ethernet, cash drawer, and USB cables for printers or other peripherals. | 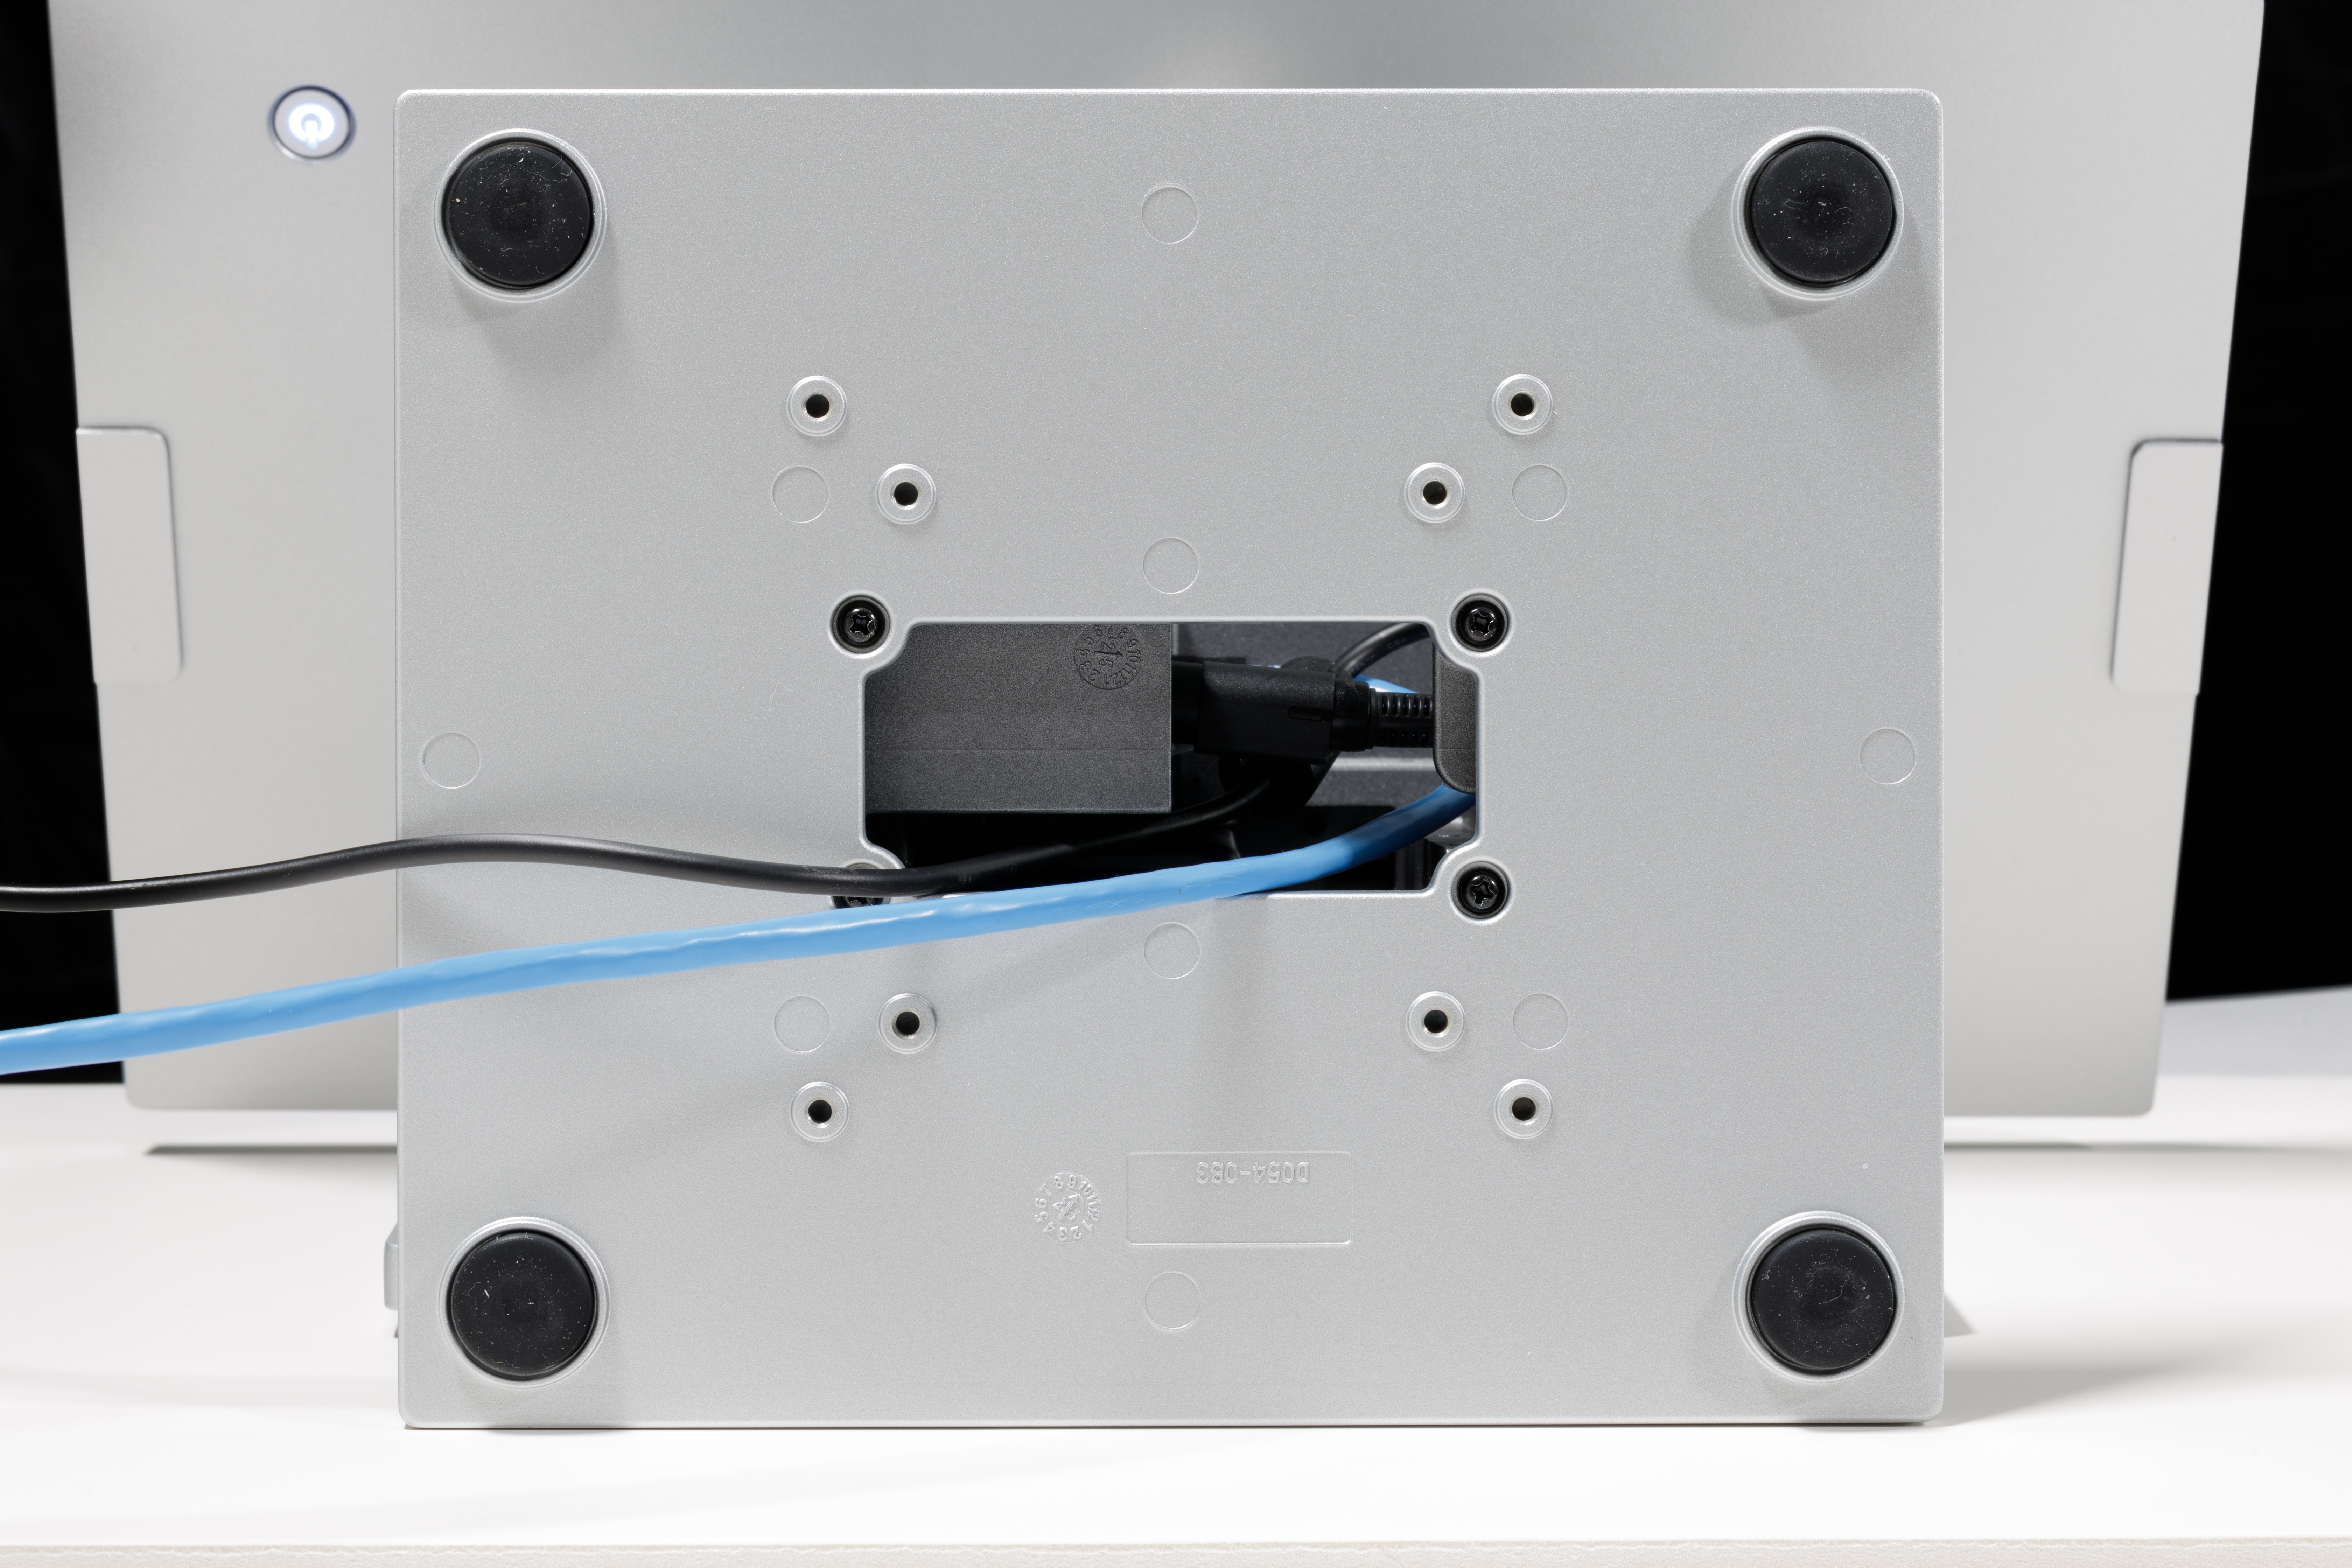 |
5 | Plug the cables into the stand port hub, then curve them into the empty space behind the hub and downward out of the bottom of the stand—if a customer-facing display was ordered, it arrives preassembled and is already plugged into the top USB-C port of the stand; ensure this cable is properly seated. | 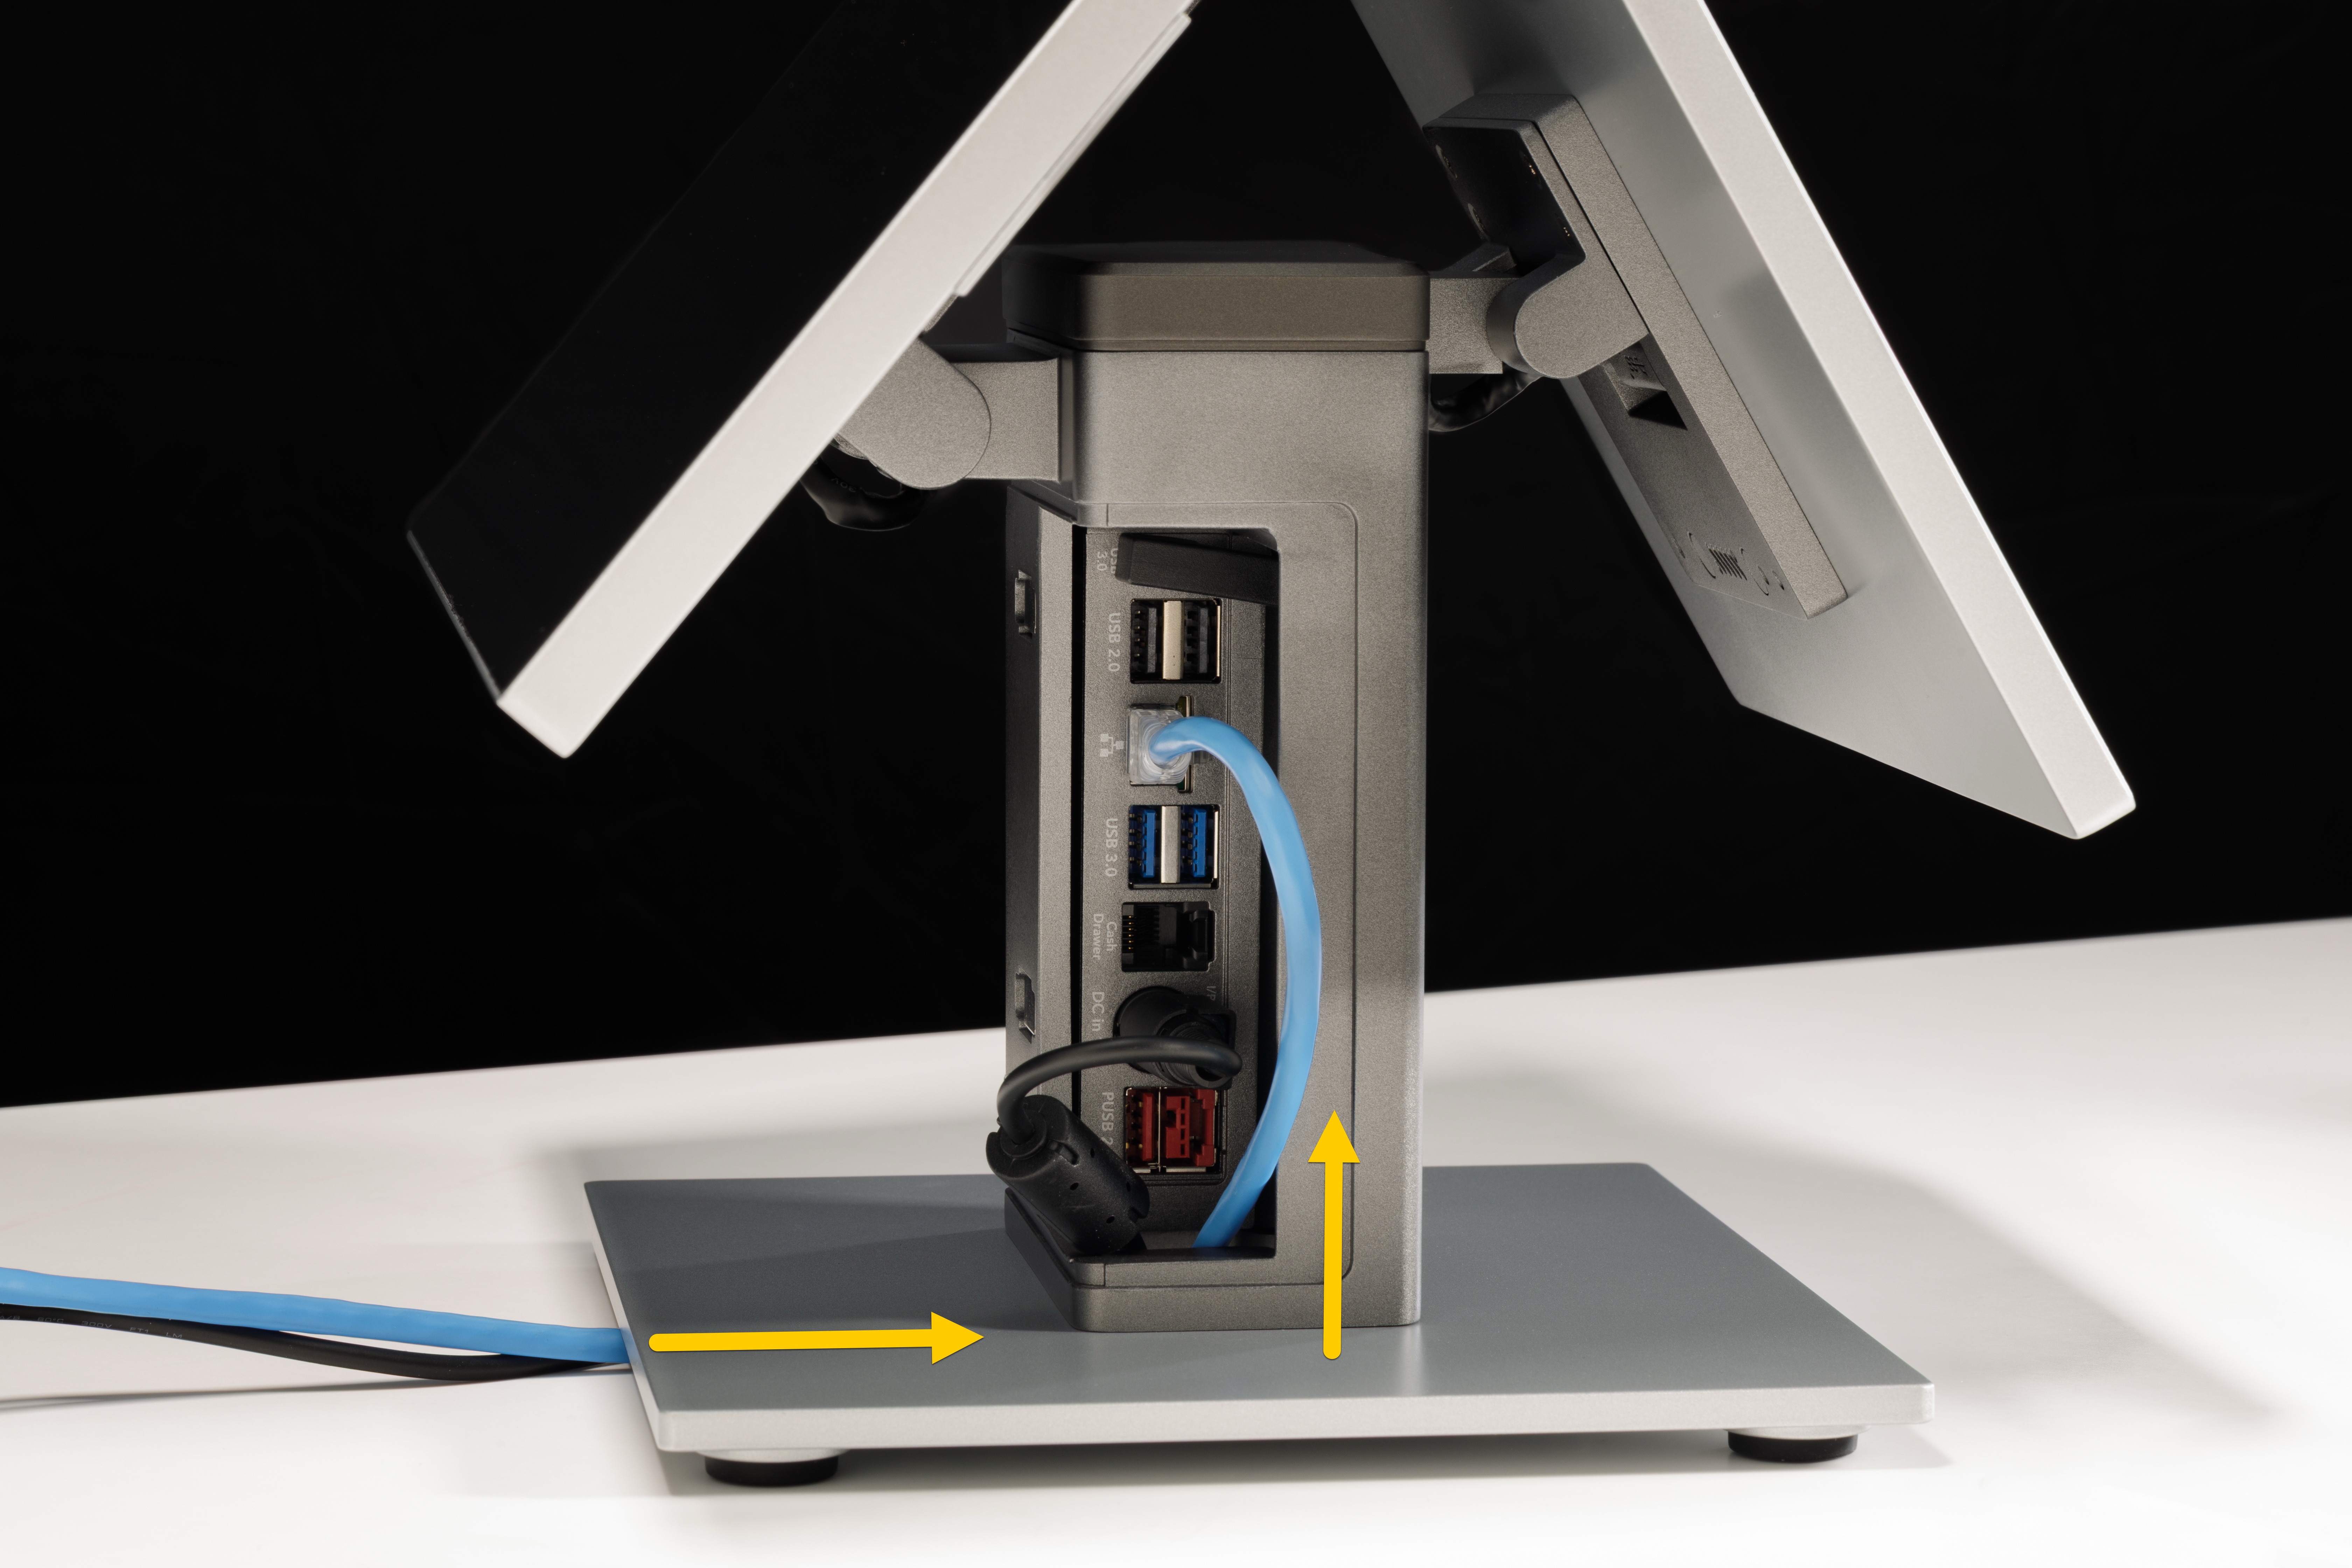 |
6 | Ensure all cables are out of the way of the stand cavity, then attach the front cable cover to the counter stand. First angle the cover so the top of the cover fits in first, then the magnets will connect on the front. | 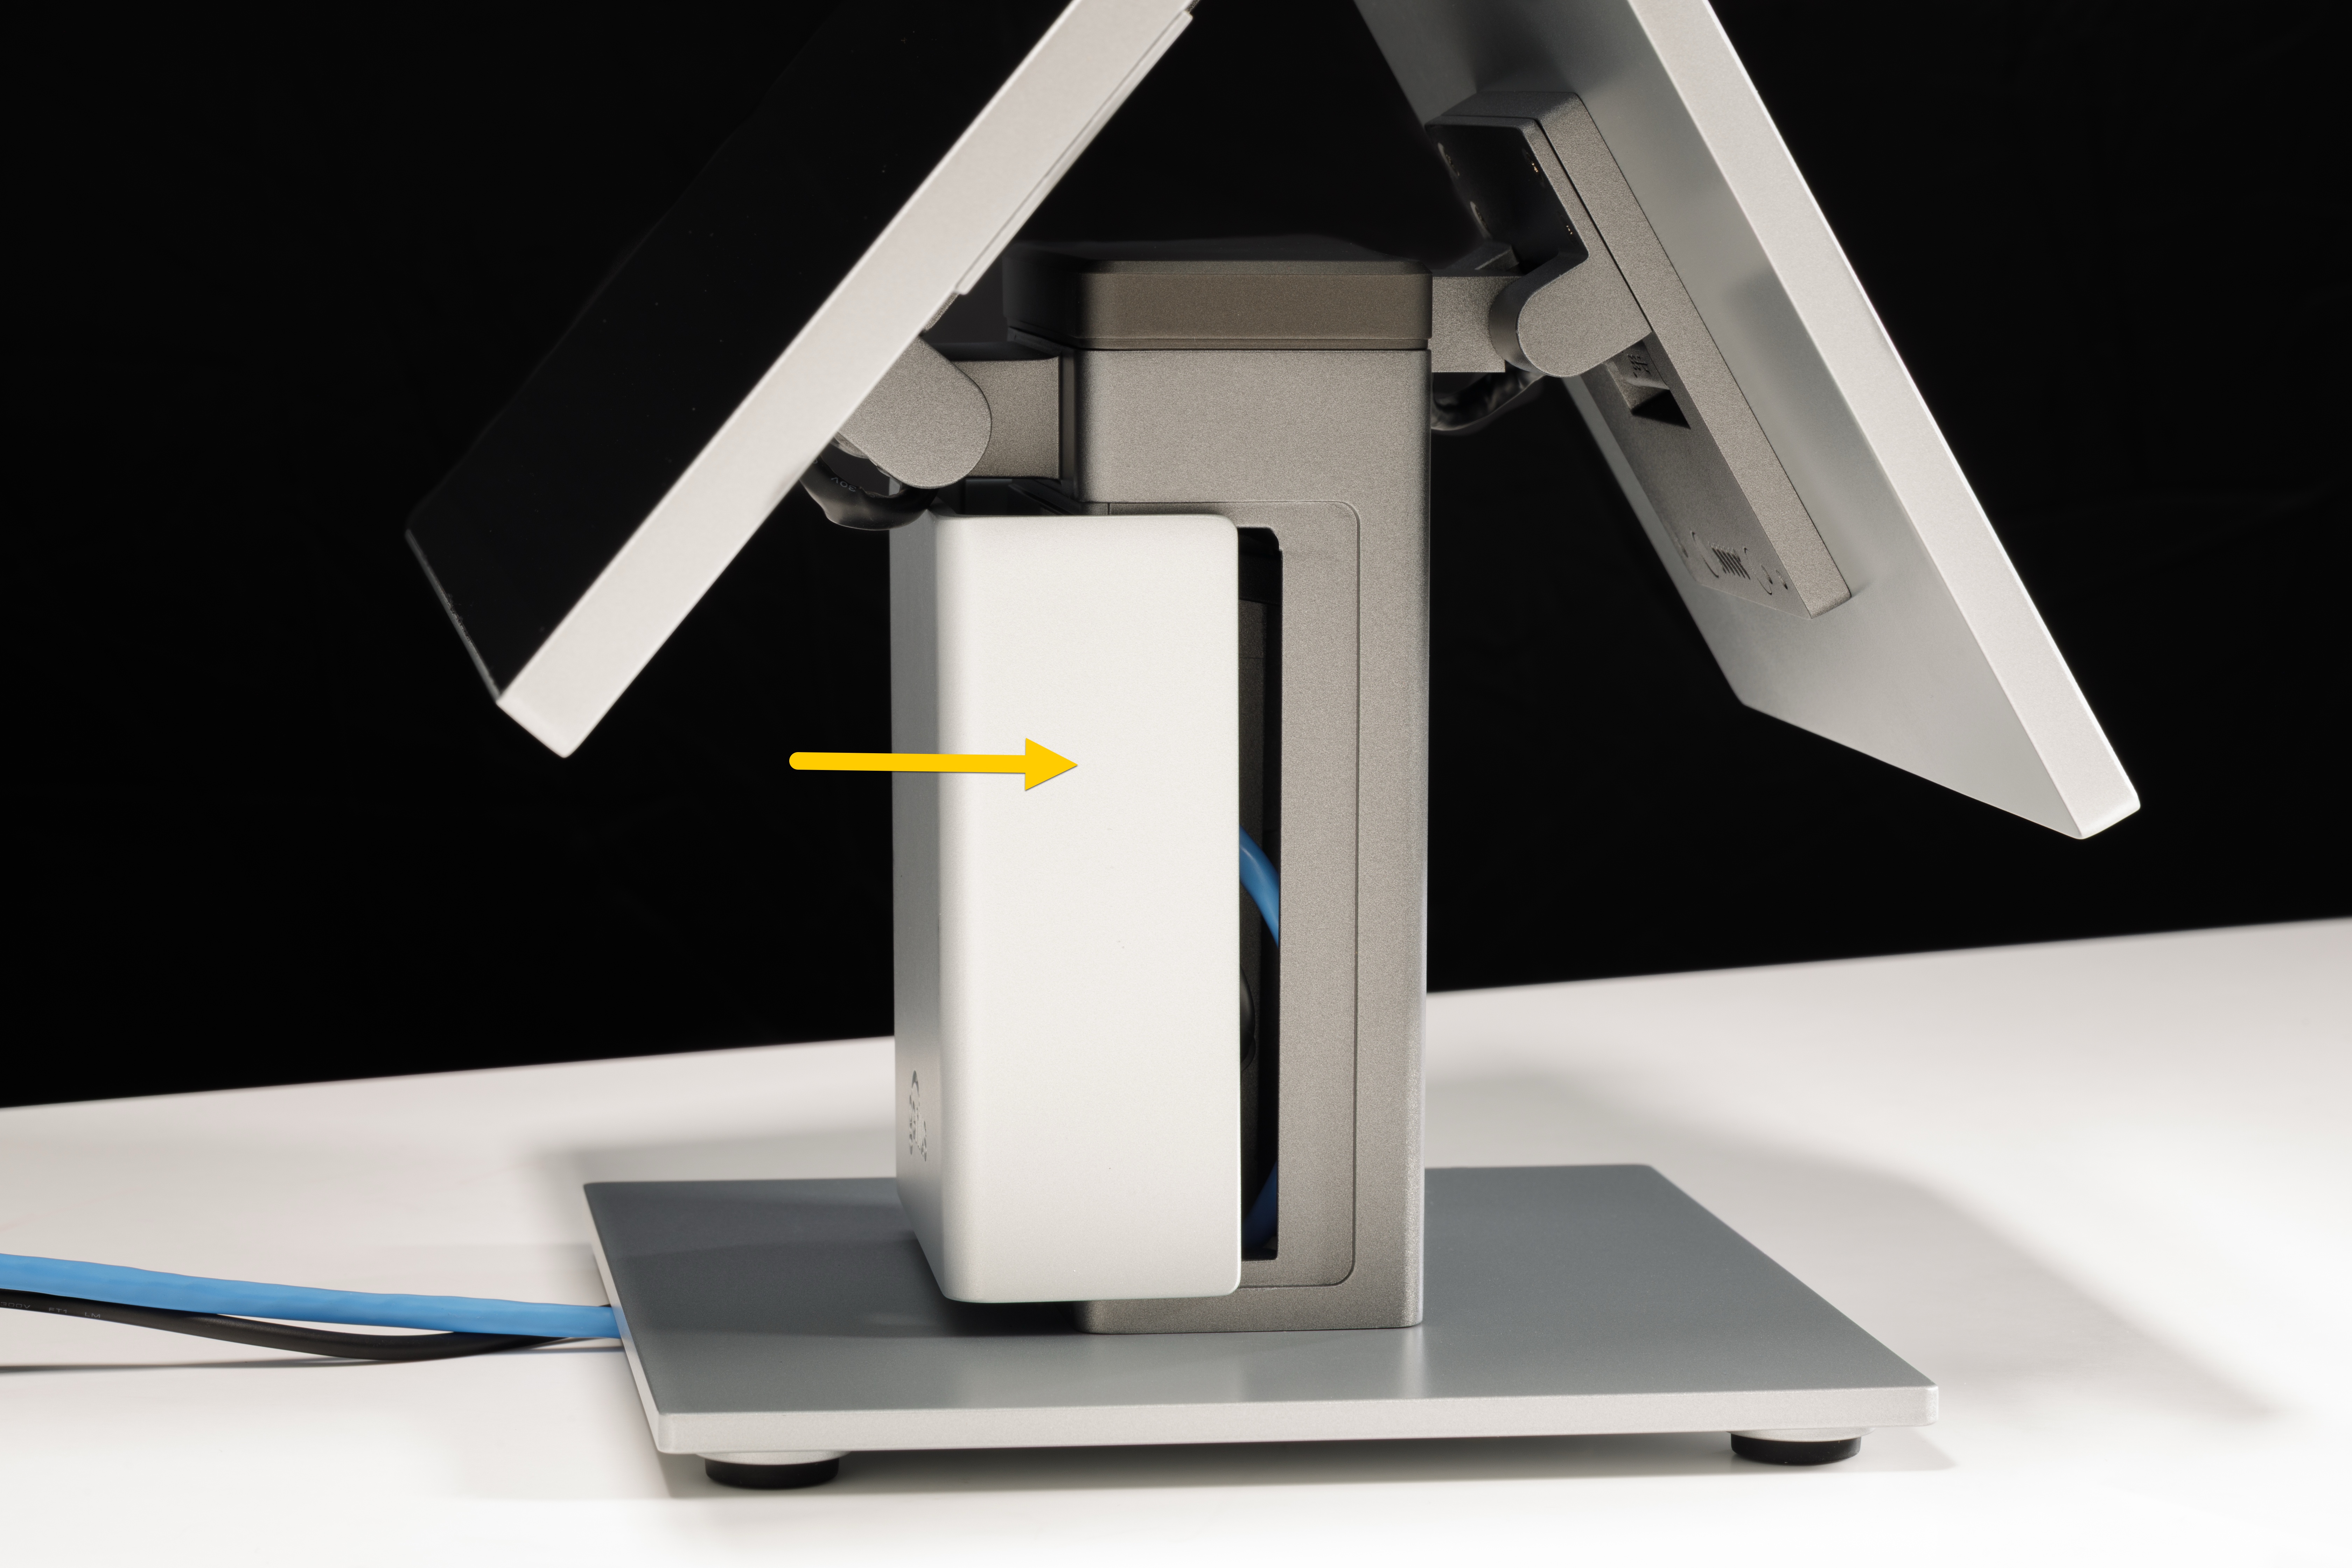 |
7 | Route wires under the counter stand and away from the GC26 in any direction needed to fit the needs of the location. |  |
8 | Remove the black top cover for the counter stand to access the display cable(s)—remove and discard the tape securing the cover. | 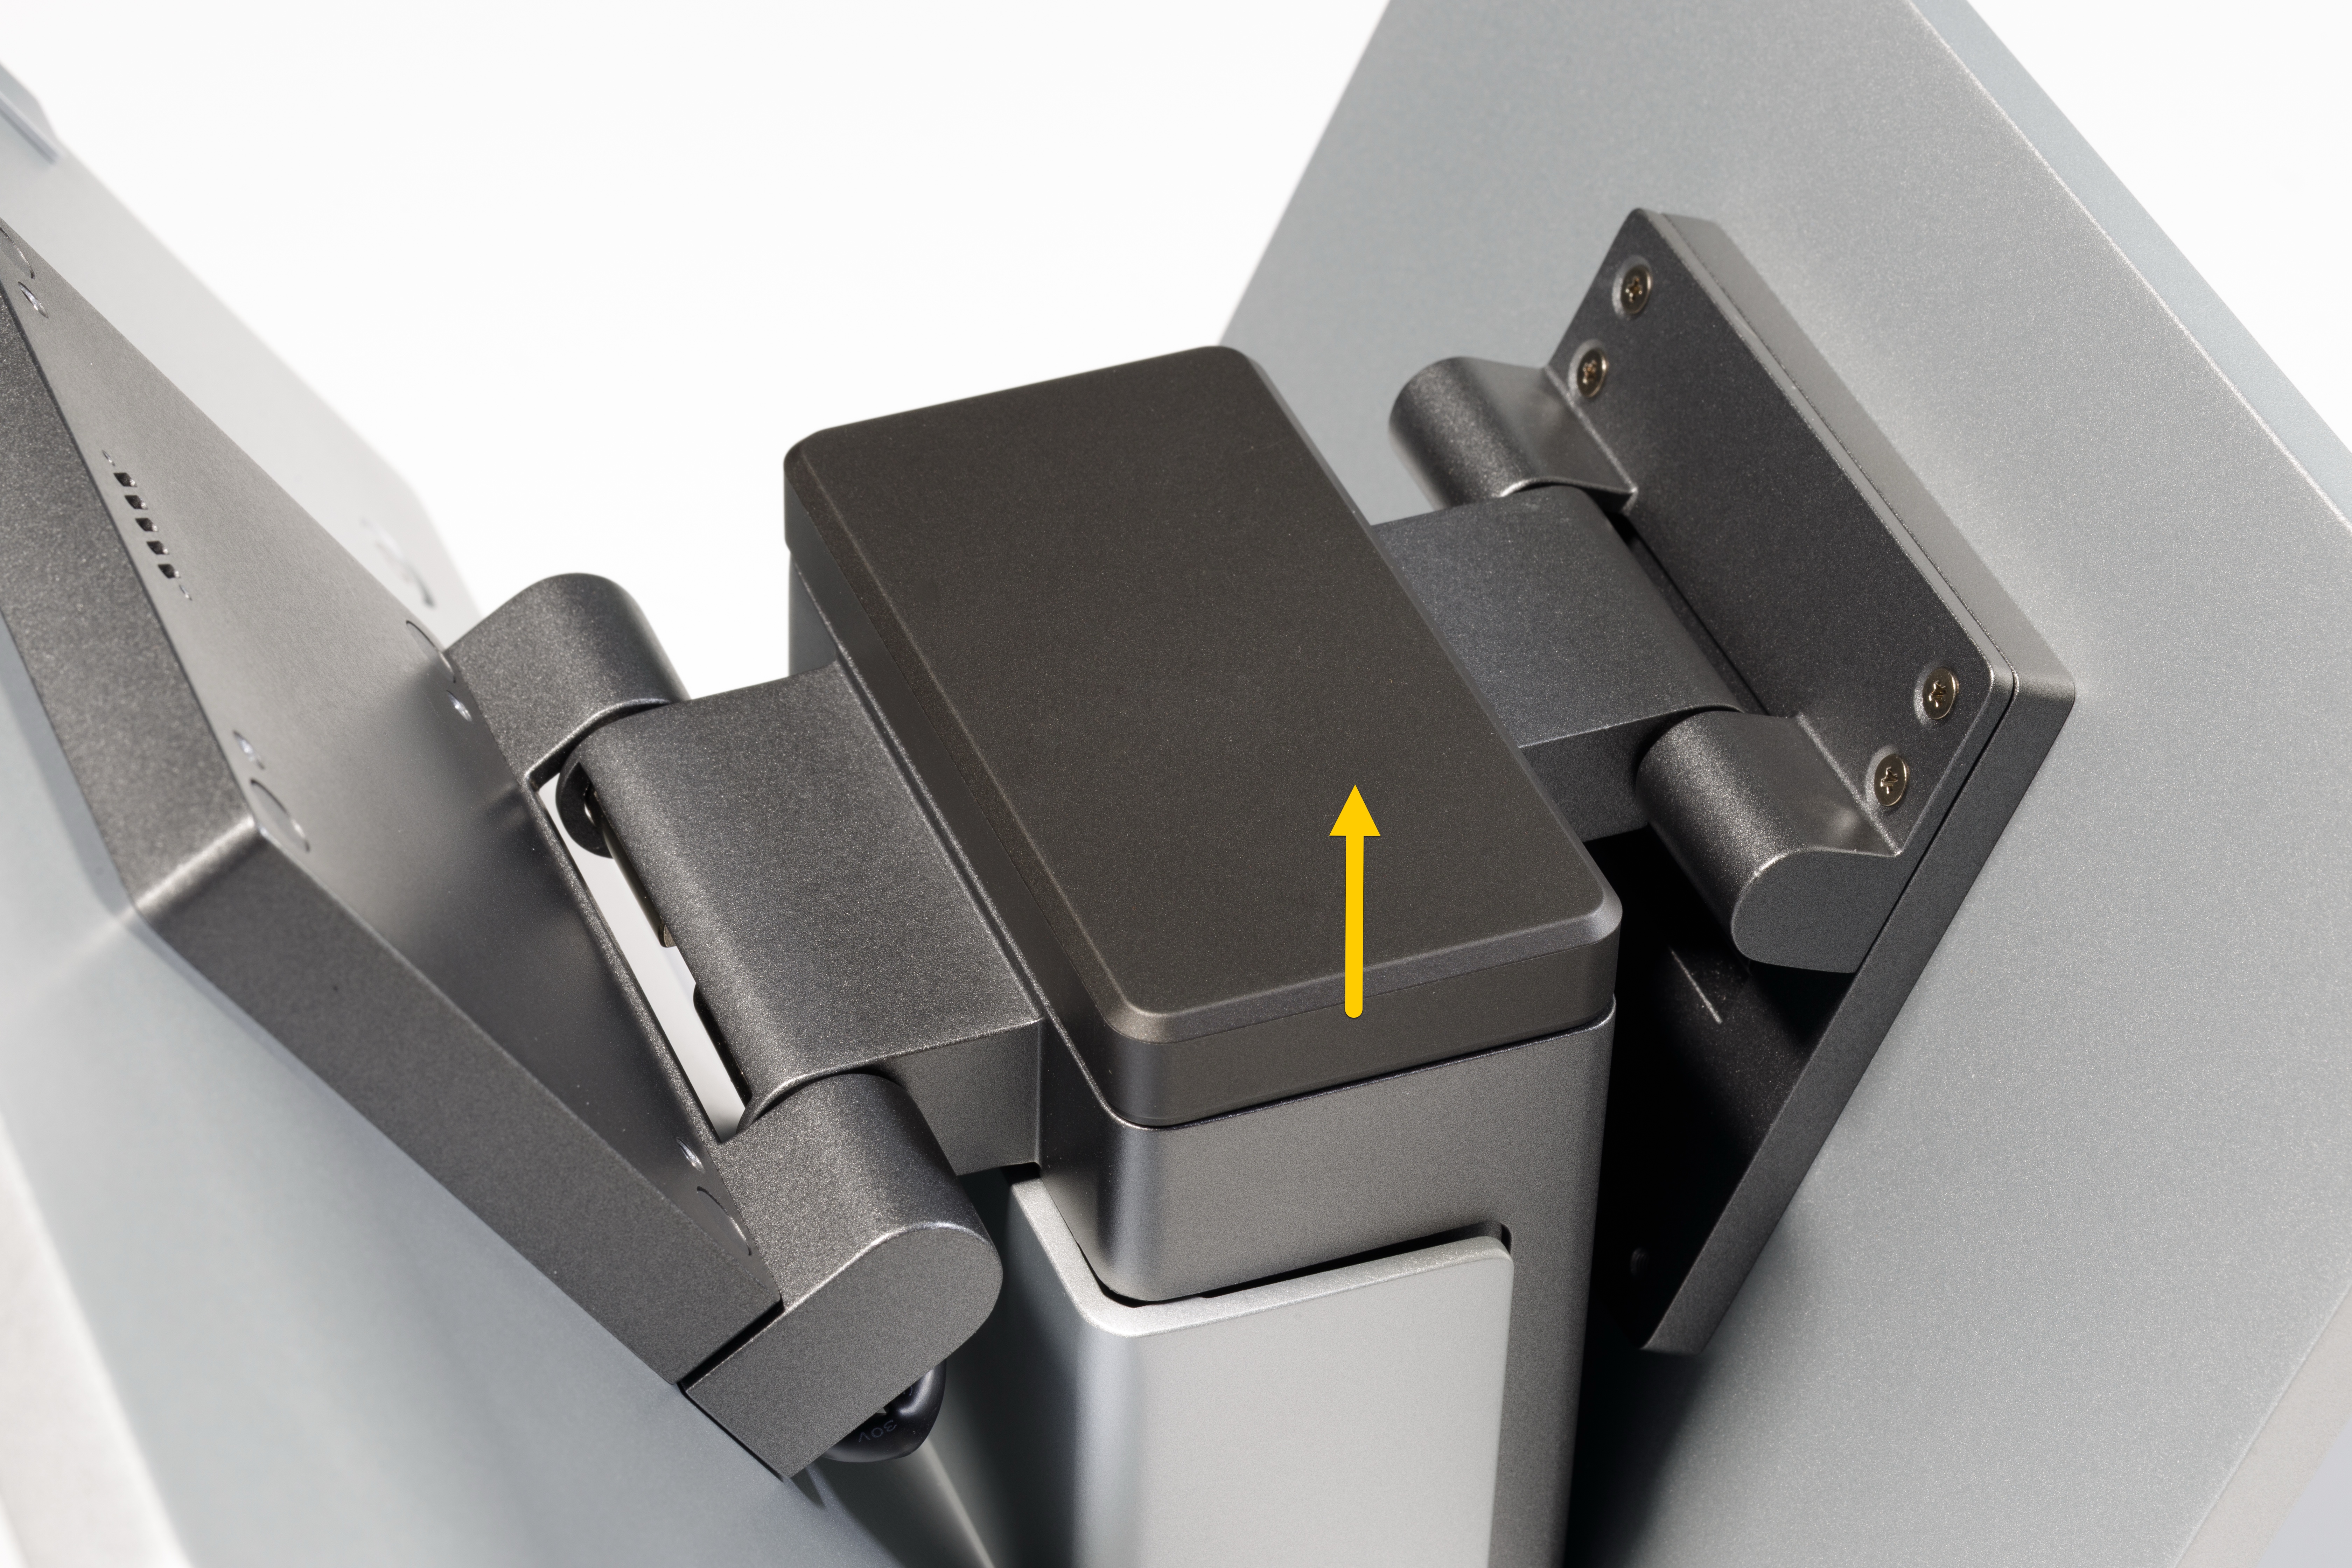 |
9 | Ensure the Merchant-Facing Display (MFD) cable is properly seated in the back, under the display arm. |  |
10 | If an optional Customer-Facing Display (CFD) was ordered, ensure its cable is properly seated in the back, under the display arm. | 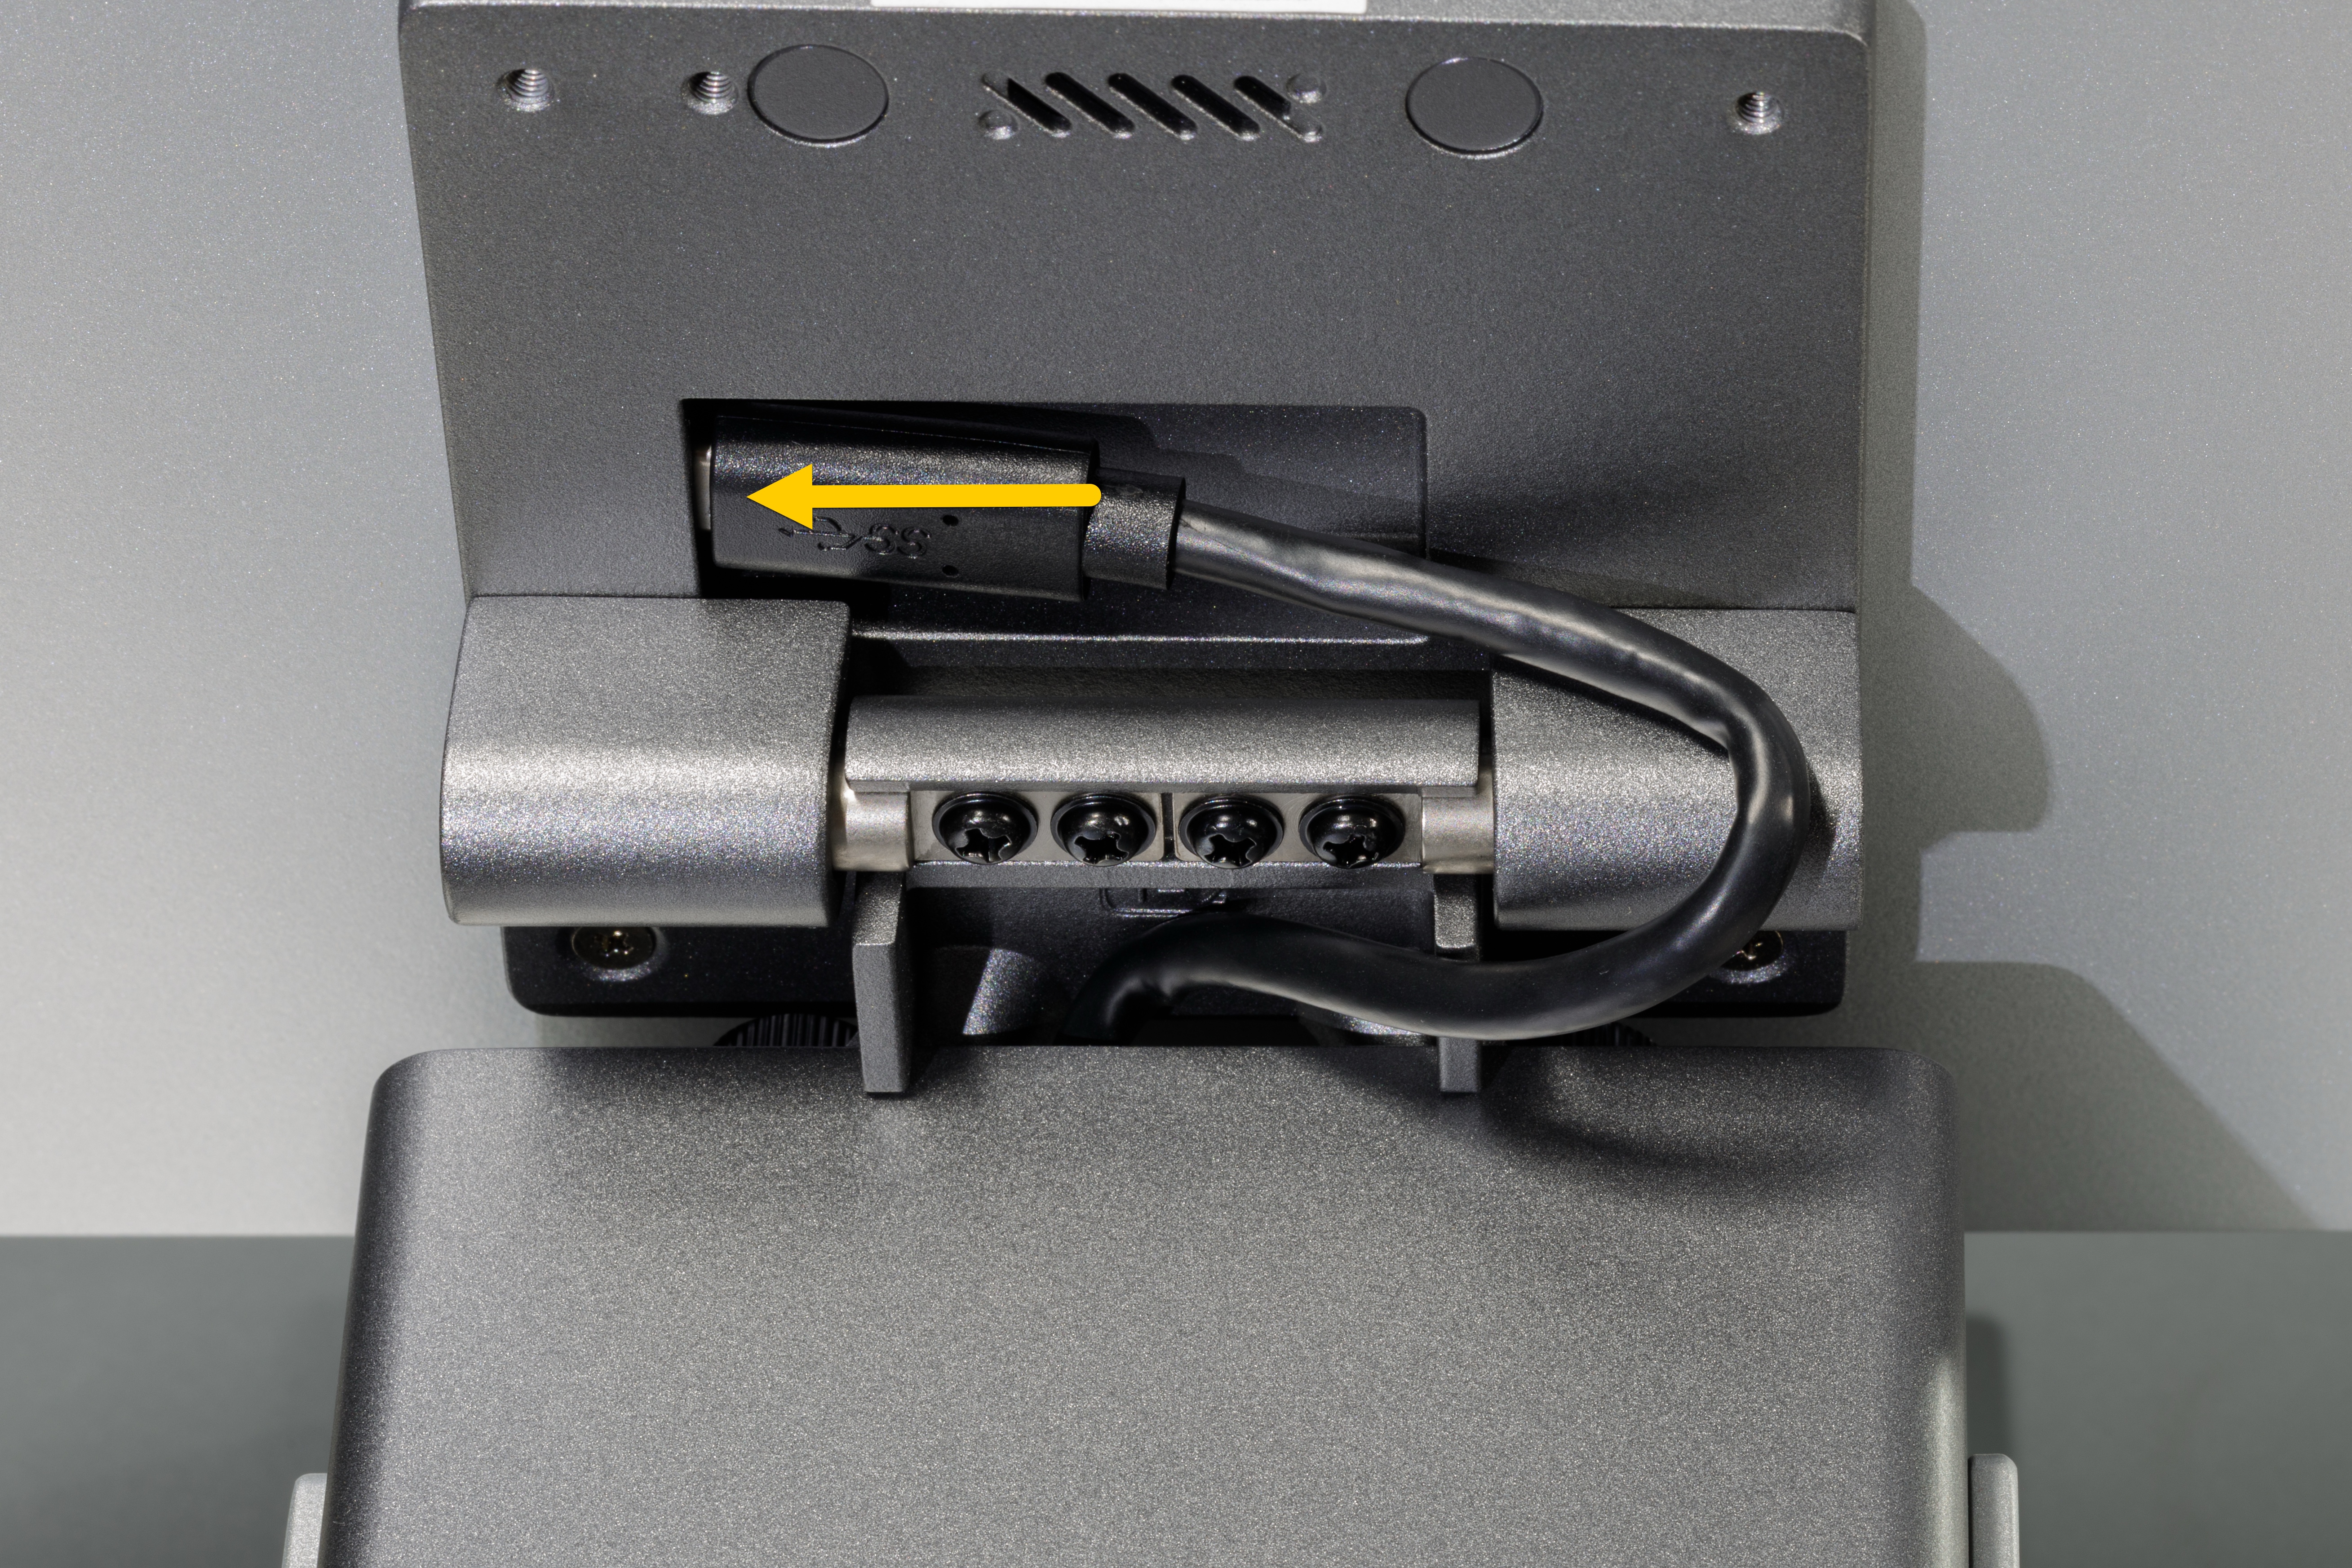 |
11 | Ensure the other end of the MFD cable is properly plugged into the top of the counter stand. | 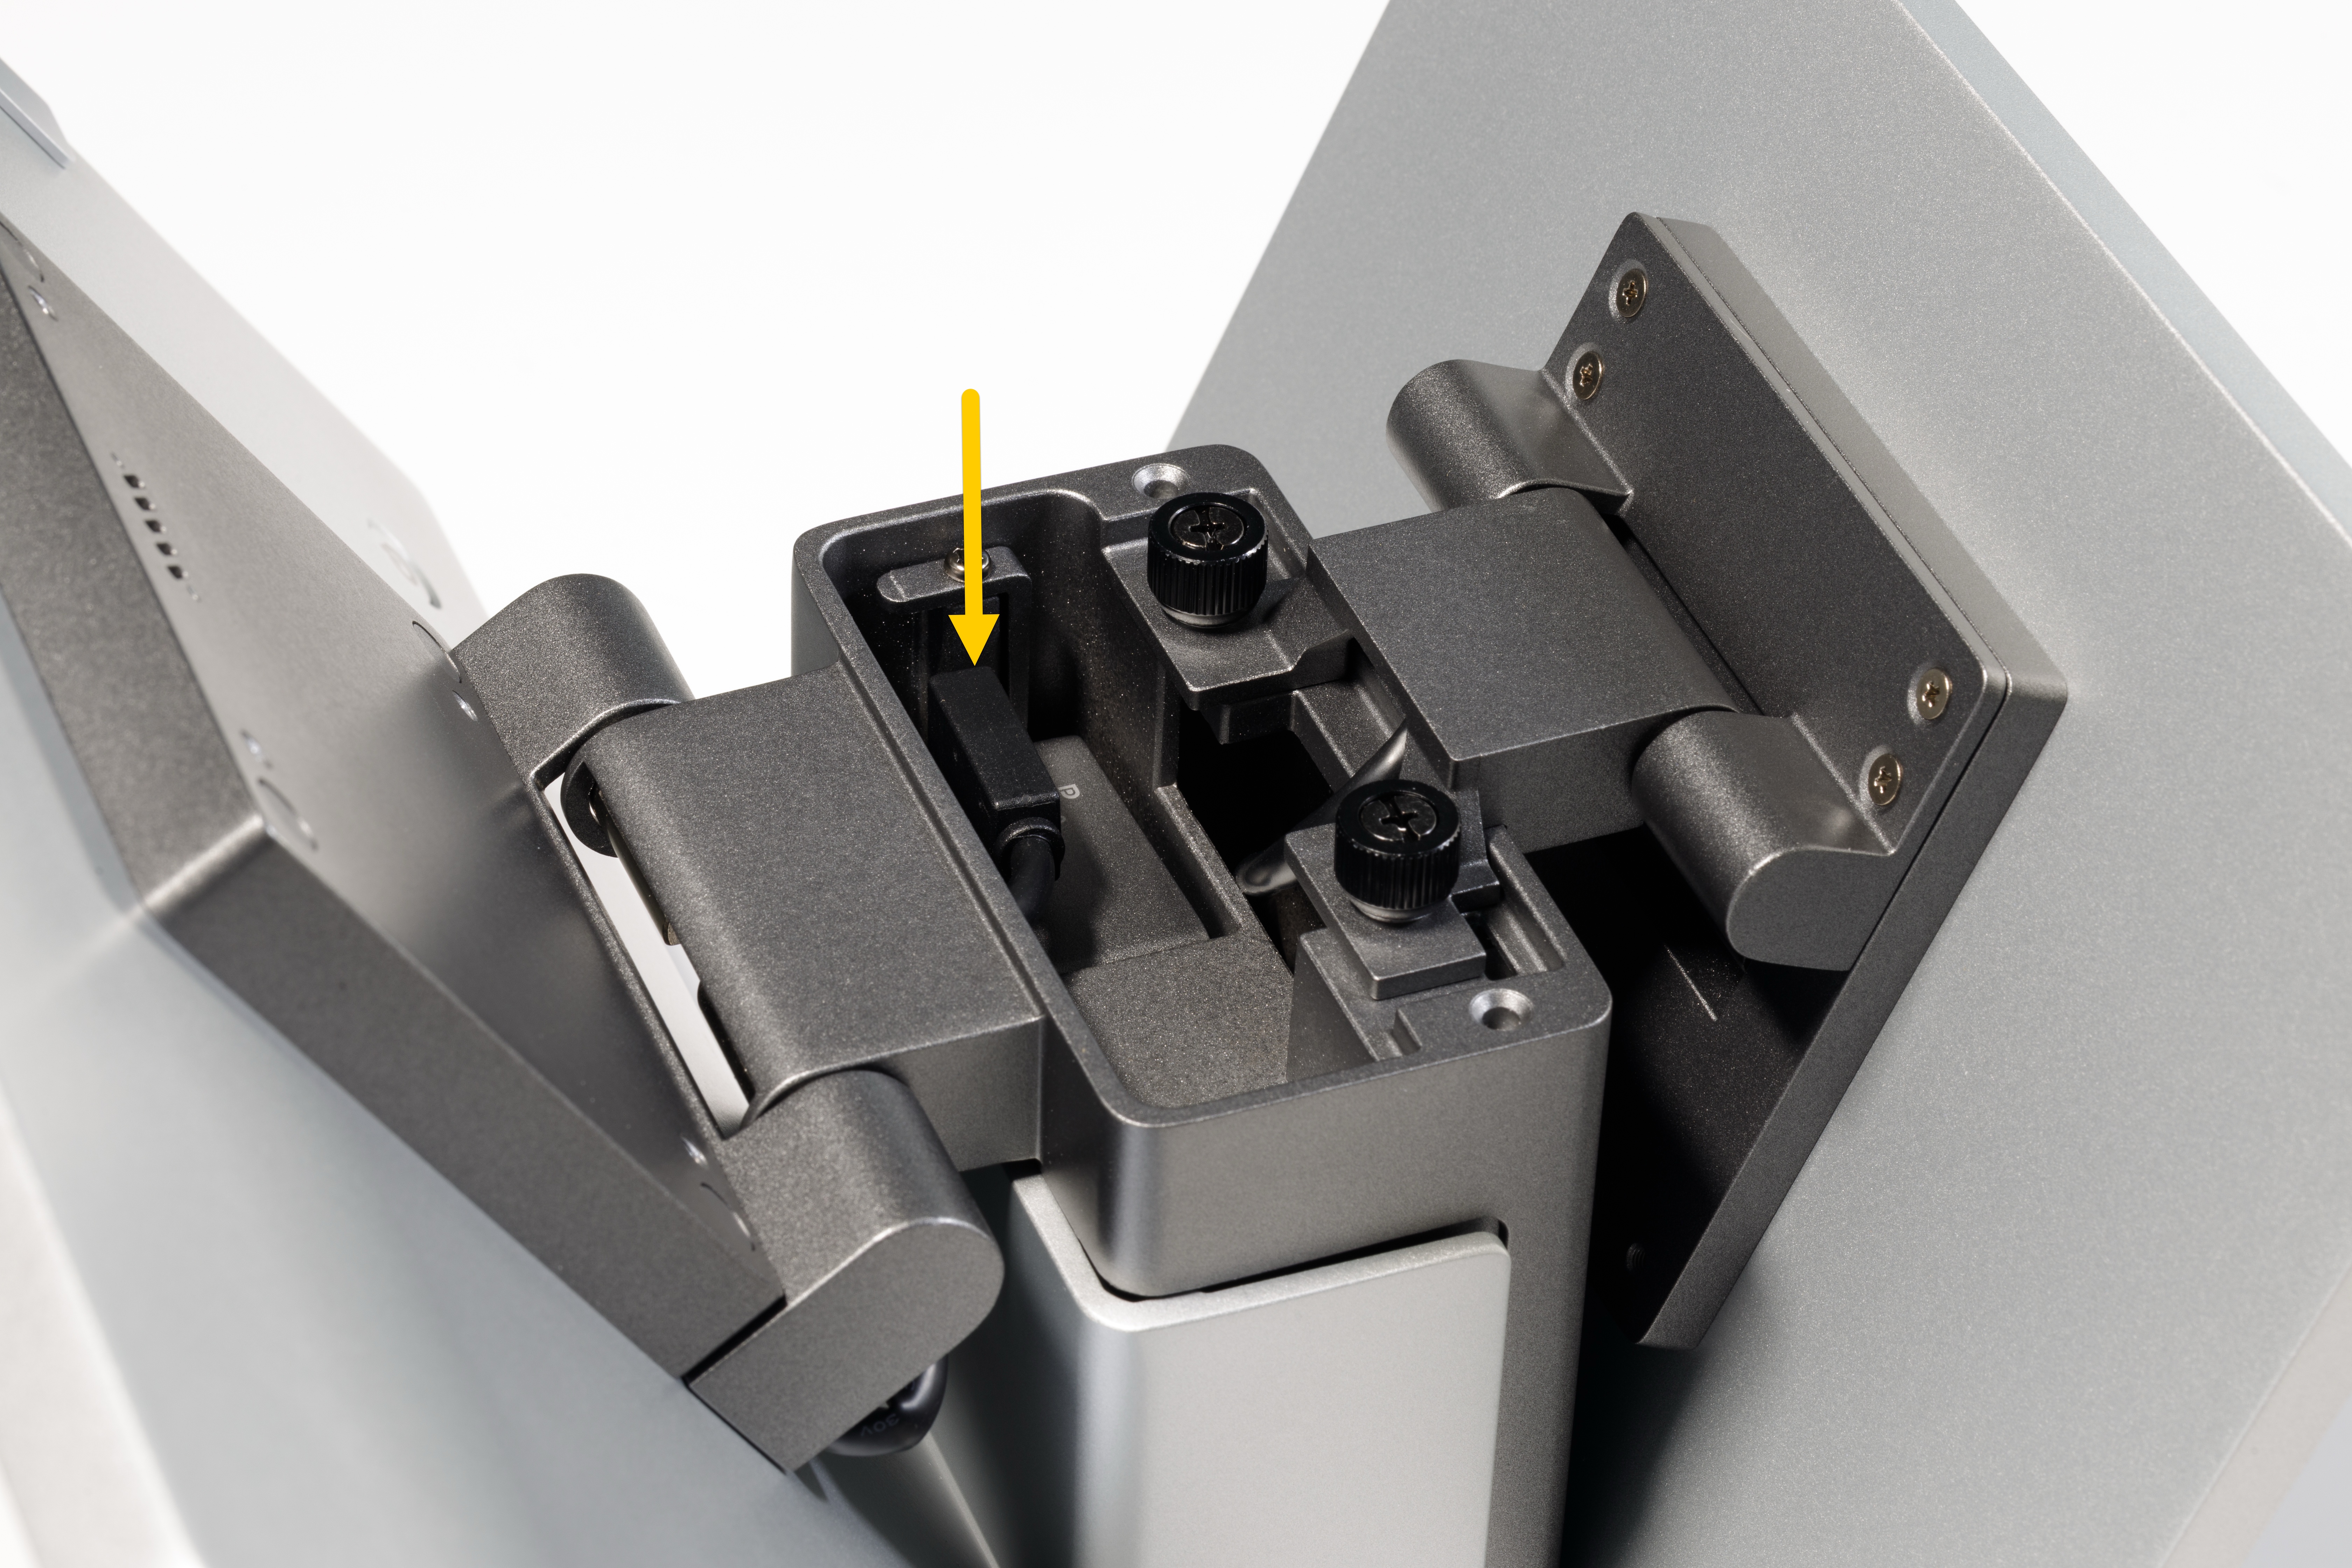 |
12 | Reattach the top cover of the counter stand. |  |
13 | Adjust the MFD and CFD screens to the desired angles |  |
14 | Attach the power cable to a power outlet. | |
15 | Power on the MFD—locate the power button on the lower left back corner of the MFD. When the display powers on, the button illuminates blue. | |
16 | After the boot-up process the GC26 launches the Genius app. Proceed to setup Wi-Fi and the Genius app as usual. |
Only registered devices are able to access Genius Restaurant at a specific location.
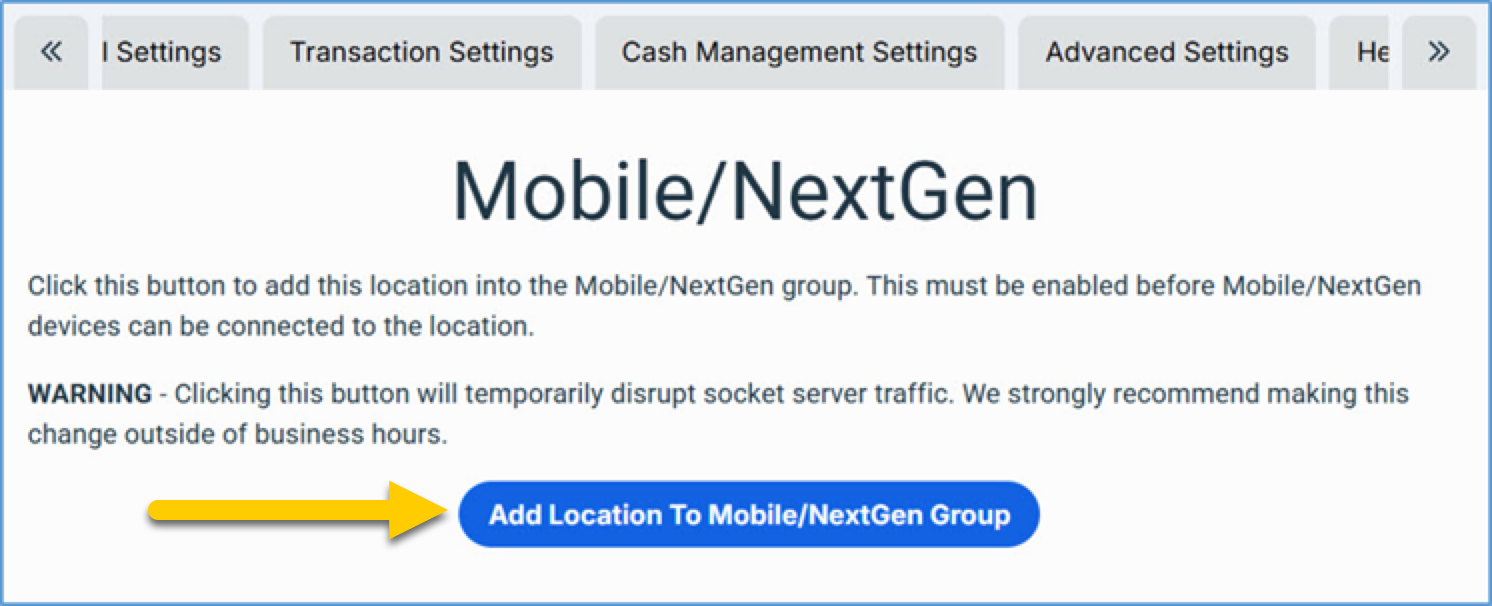
To enable Genius Restaurant on a device::
From a web browser, log into the Admin Portal for your account and location.
From the Main Menu, select Location Setup.
From the Location Settings screen, select the Mobile/NextGen Settings tab.
From the Mobile/Next Gen Settings tab, select Add Location to Mobile NextGen Group, see image.
Force close and restart the Restaurant app on all non-NextGen network devices including tablets and kiosks. This action resets the device socket connection and helps avoid performance disruptions.
If the display does not power on, check the connections to the power supply and the corresponding outlet.
Ensure all cables are securely seated in their correct ports of the hub.
Verify network connectivity for Ethernet connections.